Tuesday, 31 August 2021

Maker Forte - Layered Stamping Video Tutorial + GIVEAWAY

Hello Everyone, 

I'm at Maker Forte's blog with these One Layered Flower Cards using Maker Forte - Hello Spring Layering Stamp Set designed by Alex Syberia. I really had so much fun creating these cards that I couldn't stop to just one ;). So, here I made three different one layered Flower cards using single stamp set with Layered Stamping Technique.


To make these cards, I've used Maker Forte - Ultra White - Heavy Weight 110lb A2 size Card base. I have put a video together to show you a step by step process here at my YouTube channel along with a GIVEAWAY..


Card 1


I've used Altenew "Shades of Purple" & "Sea Shore" Ink set for Layered Stamping for the Flower & Leaves respectively.. For the center of the flower ,I've used "Squeezed Lemonade" Distress Oxide. And Finally I completed this one layered card by stamping the sentiment from Stamp - You Matter to Me - Alex Syberia Design using Color Hive - Eclipse Black Ink Pad.


Card 2


I've used same technique as shown in the above Video Tutorial to make this card and just changed the colors. I've used Altenew's "Red Cosmos" Ink set for the flowers and for the leaves I've used "Tumbled Glass" and "Salty Ocean" Distress Inks. This beautiful sentiment is from same Stamp - You Matter to Me which is designed by Alex Syberia.


Card 3


For this final card, I've used different shades of Pink & Green from my stash to stamp the layers. And just add interest I heat embossed the center of the flower & the sentiment using Ranger's Gold Embossing Powder to complete this one layered Flower Friendship card.


I hope you feel inspired to get creative today!. Thank you so much for stopping by!


Hugsxx 
Deepti Aggarwal 

Playing along with:

Tuesday, 24 August 2021

Crealies - Fun Fold Love Card

Hello Everyone,

I'm stopping by to share this fun fold Love card using Crealies latest On the Move dies. It's so fun & easy to make card which comes together very fast using the dies. 

Over to my card.. 


To make this card, I die cut out the Kraft, White and Printed Card stock using "On the move dies" and put them together by layering all the die cut out pieces.


After that, I die cut out I & U from Alfies dies and adhered to the 1st & 3rd floating panels using foam tape. Then I stamped this cute Elephant from Bit & Pieces on white cardstock. I colored it using Alcohol markers & fussy cut it.


I adhered this cute stamped Elephant on middle panel using foam tape along with colored die cut out heart And ta da.. our quick love card with fun fold is ready.

I hope you get inspired.

Thank you so much for stopping by!! 

Hugsxx
Deepti Aggarwal

I have used following Crealies products:

Crealies Dies / Stansen:


Sunday, 22 August 2021

Kinda Cute by Patricia - Dragonfly Card

Hello Everyone,

I'm stopping by to share my DT Post for Kinda Cute by Patricia. For this card,  I have used this cute Digi set called 'Dragonflies'  which has included 3 cute Dragonfly digital images in different poses. Over to my card..


To make this card, I took photo paper and created this background using Distress Oxides which was actually a failed attempt of what I was trying to achieve. But I really like the texture it has created so at the end it was an happy experiment ;). Then I die cut of the circles and adhered the rest of the panel on White card base.


Meanwhile, I printed this cute digis, colored these with Alcohol markers and fussy cut it. I adhered it to the card panel using foam tape.


I die cut out the "Wishes" sentiment from Winnie & Walter which I layered and adhered it to the card panel along with stamped "Happy" sentiment. Finally I added some clear sequins to complete this card.

I really like how it turned out. I hope you like it too.

Thank you so much for stopping by!!

Hugsxx

Deepti Aggarwal

Playing along with:

Saturday, 21 August 2021

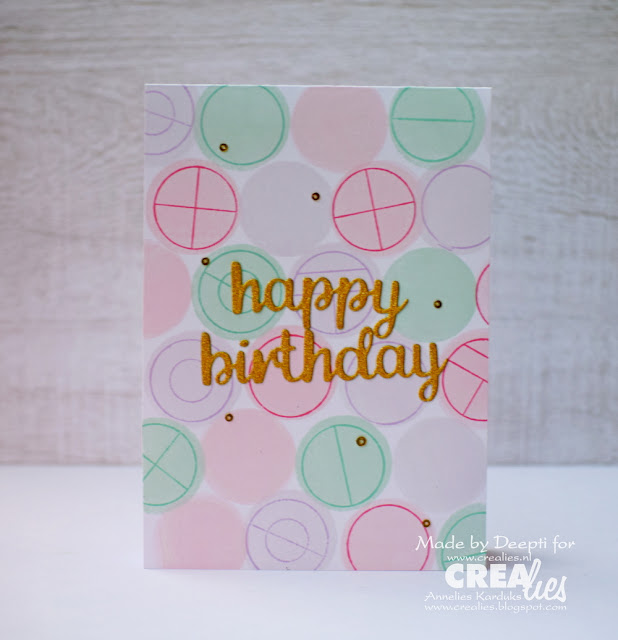
Crealies - Stamped Geometric Birthday Cards

Hello Everyone,

Have you ever used back side of your stamp for stamping??? Today I'm stopping by to share these quick & easy Stamped Geometric Birthday Cards using the same.  


And I have a video tutorial at my YouTube channel here to show you how I made these Geometric Birthday Cards. If you like what I create then please support me by subscribing to my channel..:)


Here is Card 1 using Crealies Hexagon Element stamp where I've used bright & bold Distress Oxide colors to make this masculine Birthday card..


Here is the close up..


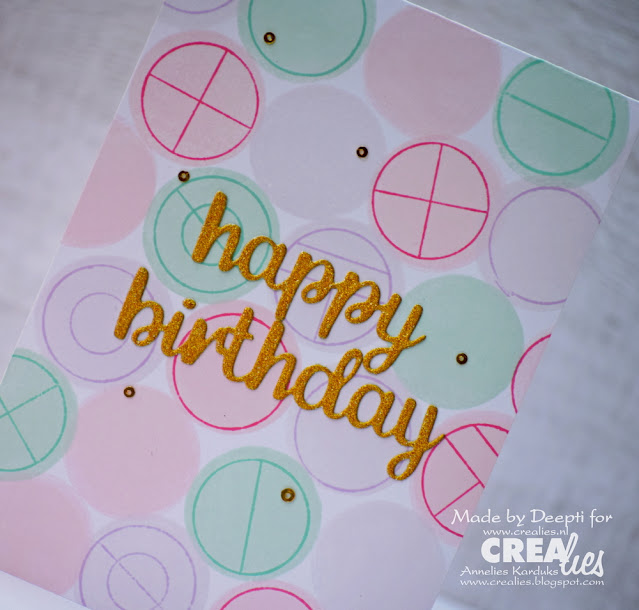
Here is my second Card using Crealies Circle Element stamp where I've used Light & Pastel colors with the touch of  Gold to make this feminine Birthday card..


Here is the close up..


I really enjoyed making these Geometric Cards. Let me know which one you like the most..


I hope you get inspired.

Thank you so much for stopping by!! 

Hugsxx
Deepti Aggarwal

I have used following Crealies products:

Crealies Dies / Stansen:


  Stamping cardstock, white 240 grams (20x A4)    

Thursday, 12 August 2021

Crealies - Happy Birthday Card

Hello Everyone,

I'm stopping by to share this stenciled Birthday card where I've used the Circle stencil for stenciling as well as for dry embossing. 

Over to my card..


To make this card, I took White Card base which I ink blended from the edges using Distress Oxides then stenciled it with Circle stencil using the same ink.


Then, I die cut out White Card panel using stitched rectangle dies and dry embossed it with same Circle stencil using Die cutting machine. I stamped the sentiment repeatedly using the same Distress Oxide color which I've used for stenciling and mounted it on the stenciled card base.


Meanwhile, I die cut this square using Element dies and the Bows on White card stock and ink blended it with Distress Oxides. 


I arranged the die cut out square and the bows like a gift and adhered it to the card panel along with some gem stones to complete this Birthday Card.

I hope you get inspired.

Thank you so much for stopping by!! 

Hugsxx
Deepti Aggarwal

I have used following Crealies products:

Crealies Dies / Stansen:
White stamping cardstock, 240 grams


  Stamping cardstock, white 240 grams (20x A4)     

Friday, 6 August 2021

Maker Forte - Ink blended Silhouette Christmas Cards

Hello Everyone,  

I'm at Maker Forte's blog with these easy ink blended silhouette Christmas cards using Maker Forte Wise Men Still Seek Him Stamp Set. I really like how these cards turned out with the beautiful silhouette images from the stamp set..


Card 1

To make this card, I took Maker Forte A2 size Ultra White - Heavy Weigh card stock and secured the Spotlight Circle Stencil using washi tape. Then I ink blended it using Distress Oxides to create Starry night scene. For that I've used I’ve used Wilted Violet, Blueprint Sketch and Squeezed Lemonade Distress Oxides. Once satisfied, I splattered it with white acrylic paint.


Then, I removed the stencil and stamped the silhouette nativity scene from Maker Forte Wise Men Still Seek Him Stamp Set using Colorhive Eclipse Black Ink . The best part is this round stamp exactly fits with the spotlight Circle stencil.


Card 2


To make this card, I again took Maker Forte A2 size Ultra White - Heavy Weigh card stock and stenciled it using Spotlight Easy Watercolor Stencil. I masked the stencil and ink blended it in such a way so that I can fit long stamp from the Wise Men Still Seek Him Stamp Set. I've used same Distress Oxides which I've used in my previous card. Once satisfied, I splattered it with white acrylic paint.


Then, I stamped the silhouette image from Maker Forte Wise Men Still Seek Him Stamp Set using Colorhive Eclipse Black Ink to complete this starry night Christmas Card.


I hope you get inspired. Thank you so much for stopping by.

Hugsxx 
Deepti Aggarwal ( Blog | Facebook | Instagram | YouTube )

Wednesday, 4 August 2021

Crealies - Slimline Christmas Tree Card

Hello Everyone,

I'm stopping by to share this Slimline Christmas Card using Geometric Christmas Tree Bits & Pieces Element stamp set. I really love how this card turned out with gold embossing & pigment colors. 

Over to my card..


To make this card, I die cut out the slimline panel using double stitched slimline dies and stamped the trees randomly using Versamark ink and then heat embossed it using Gold Embossing Powder.


After that, I added Pigment powder in shades of Green and sprayed lots of water using spray pen and moved the colors around the panel. I kept adding pigment colors till I was satisfied. Once this panel dried, I splattered it with green and Gold pigment colors to add interest.


Then, I adhered this panel to the Green colored card stock. I die cut out sentiment on Gold Glitter paper using Wordzz and Alfies dies and adhered to the card panel. 


For the final touch up, I added some gold sequins to complete this card.

I hope you get inspired.

Thank you so much for stopping by!! 

Hugsxx
Deepti Aggarwal

I have used following Crealies products:

Crealies Dies / Stansen: