Showing posts with label Customized. Show all posts

Wednesday, 8 November 2023

Crealies - Gift Box with a Message Envelope

Hello Everyone,

I'm stopping by to share this fun gift box using Crealies dies where you can add a Message envelope on top of the lid. Isn't it fun that you can add a personalised  message also on the gift box?? Here is the cute box..


I have used Crealies 'Create a box' mini dies to make this box. First I die cut all the layers on White card stock and then I layered it Pattern paper using the same dies. Then I assembled the whole box.


After that, I created the envelope using same Pattern paper using Crealies dies and adhered it to the top of the lid.


To further decorate the box, I die cut out this Heart charm using same Pattern Paper pad and die cut the sentiment 'For you' using Texto Negativo dies and back it up with Black card stock. 
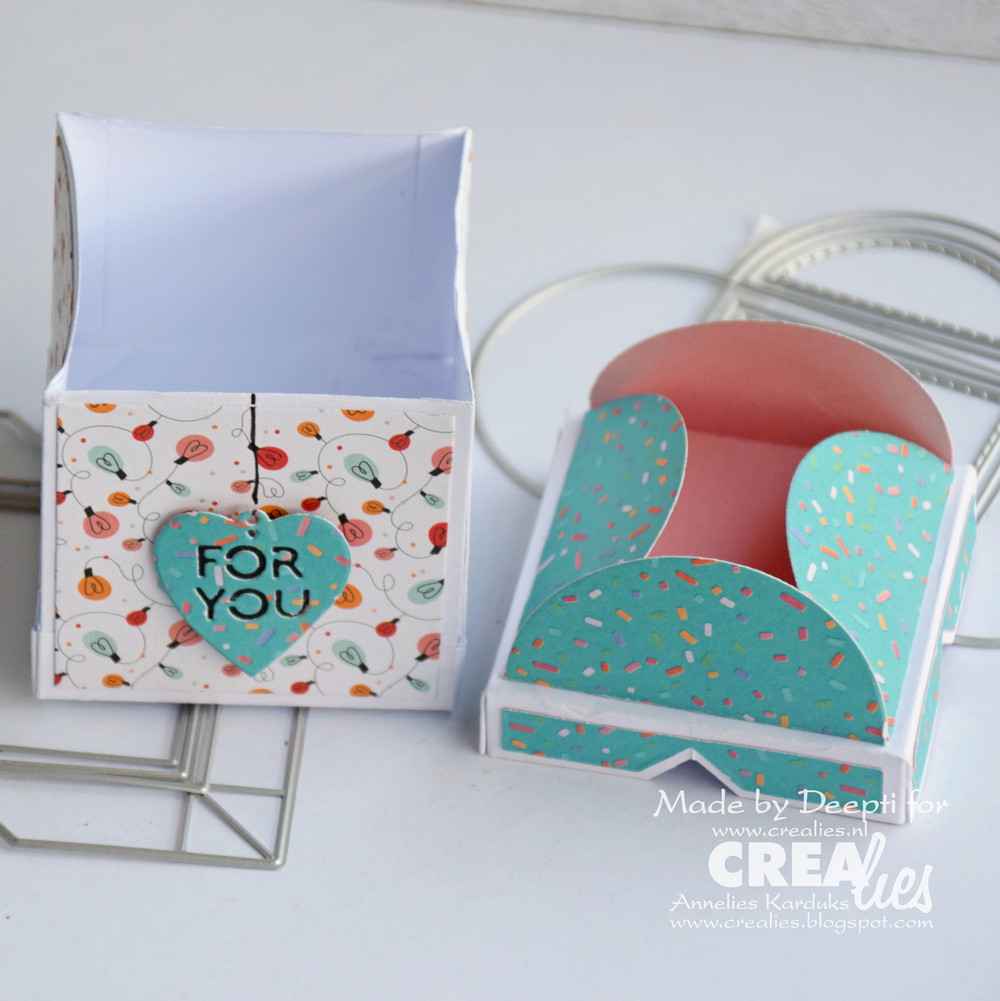

I adhered this heart charm on the box using foam tape to complete this personalised gift box. 

I hope you get inspired. Thank you so much for stopping by!

Hugsxx
Deepti Aggarwal
  
I have used following Crealies products:

Crealies Dies / Stansen:


Tuesday, 3 October 2023

Customized Doodled Name Plate

Hello Everyone,

Here is my quick post....I'm stopping by to share this customized name plate which I've made on request for a friend. 

I did lots of doodling here with the things they love :). I really like how this name plate turned out.

Here is the close up..

Some more clicks..

I really enjoyed making this customized name plate for my friend's Kid's room.

Thank you so much for stopping by!!

Hugsxx
Deepti

Wednesday, 13 September 2023

Crealies - Triangle Gift Box

Hello Everyone,

I'm stopping by to share this Triangle Gift box using Crealies "Create a box' latest dies. 


To make this box, I took white card stock and die cut it out using Crealies big Triangle box dies. I layered it with Pattern Paper using the same dies.


Once the box is ready, I decorated it with die cut out flowers and  latest silhouette leaves dies. I also added Thank you sentiment using vertical texto negativo dies


For closing the box, I've added a matching thread but you can also close it without it. Here is the pic..


And here is the close up..


I hope you get inspired. Thank you so much for stopping by!

Hugsxx
Deepti Aggarwal
  
I have used following Crealies products:


Thursday, 7 September 2023

Congrats on your new baby!

Hello Everyone,

I'm stopping by to share this customised Big CONGRATS card for new parent. I made this card for a colleague who is blessed with a baby boy 'Rio' and I made it bigger (took A4 card stock and folded it in to half) in size so that everyone in our office can sign it.

Over to my card..


To make this card, I first ink blended the edges of the front panel of the card using Distress Oxide Ink and then I stencilled it with Star stencil from Crealies using the same ink.


Meanwhile, I drew this baby onesie on the Pattern Paper and cut it out with a pair of scissors. I adhered it to the card panel using foam tape to add some dimension. Then I customised it by adding the name of the baby using Crealies Texto Negativo dies.


I added the die cut out Congrats sentiment from STAMPlorations and also added the hand written sentiment below it. Finally I added gemstones to the baby onesie to add interest.

I hope you get inspired. Thank you so much for stopping by!! 

Hugsxx
Deepti Aggarwal

Playing along with:

Tuesday, 5 September 2023

Crealies - Christmas Theme Milk Carton Gift Box

Hello Everyone,

I'm stopping by to share this Christmas theme Gift box which I've made using Crealies "Create a box' Milk Carton big dies. I really love the size of this box..


To make this box, I took white card stock and die cut it out using Crealies big Milk Carton box dies. I layered it with Pattern Paper using the same dies.


Once the box is ready, I decorated it using latest silhouette leaves dies and Jingle bell dies which I die cut it out in dark Green and Mirrored Silver Card stock respectively.


For closing the box, I added a tiny matching wooden clip along with die cut out "For you" sentiment, some leaves & bells. 

Here is the close up...


I hope you get inspired. Thank you so much for stopping by!

Hugsxx
Deepti Aggarwal
  
I have used following Crealies products:

Crealies Dies / Stansen:


Playing along with:
Simon Says Wednesday Challenge: Anything Goes

Thursday, 24 August 2023

Crealies - Twist & Pop Birthday Card

Hello Everyone,

I'm stopping by to share this fun Twist & Pop Birthday card using Crealies latest Twist & Pop with 4 panels dies. I enjoyed playing with these dies and made this card for my Nephew who is turning 12 this month. 

Over to my card... 


I also made the reel for this card to show the Twist & Popup mechanism


To make the front part of this card, I have used Crealies fun Alphabet dies (this is one of my favourite dies) and decorated it using Crealies Partzz party elements dies. Aren't these alphabet looks so fun & playful?


To make the Twist & Pop mechanism, I have used Crealies latest Twist & Pop dies along with Square panels. Check Crealies Youtube channel to see how to make this mechanism.


I decorated inside of the card using pattern paper and same Alphabet dies. I also added a bunch of balloons ephemera  from the same pattern paper set which I fussy cut and adhered to the card panel.


I added wavy black lines using fine Black pen at the edges of all the card panels to add interest.

Here is the close up..


I really like how this card turned out. I hope you get inspired. 

Thank you so much for stopping by!

Hugsxx
Deepti Aggarwal
  
I have used following Crealies products:

Crealies Dies / Stansen:

Saturday, 19 August 2023

Avecreative - Congrats to the new Mr. & Mrs.!!

Hello Everyone,

I'm stopping by to share another customised congrats card which I've made for a colleague who got recently married. Again, I made it bigger in size (took A4 card stock and folded it in to half)  so that everyone in our office can sign it.

Over to my card..


To make this card, I first ink blended the edges of the front panel of the card using Distress Oxide Ink and then I stencilled it with polka dot stencil from Decotime using the same ink.


Meanwhile, I die cut of this beautiful wedding cake using Avecreative - Love2craft dies on White and Mirror gold car stock. I also coloured some of the die cut out pieces using alcohol markers. I adhered all the pieces of the cake using foam tape and glue. 


Once satisfied, I added the die cut out Congrats sentiment from Your Next Stamp and also added the hand written sentiment below it. 


Finally I added the Mirror Gold card stock frame to add interest to complete this wedding card. I really love how this card turned out. Isn't it beautiful??


I hope you get inspired. Thank you so much for stopping by!! 

Hugsxx
Deepti Aggarwal

Playing along with:
Simon Says: Use Your Favorite Technique - Ink blending & Stenciling
Cut it Up Challenge #284 ~ Create a Scene _ wedding cake on a wedding day :)
Stencil Fun Challenge - August _ playing with anything goes with stencil