Friday 30 July 2021

Maker Forte - Kraft Christmas Cards - Video Tutorial

Hello Everyone, 

I'm at Maker Forte's blog with these Kraft Christmas Cards which can be easily mass produced. I'm using Maker Forte "Christmas in July" release to make these cards. I hope you have already checked this wonderful release.. If not.. then you can find it here.. I've used For You My Deer and Gingerbread Village 6x8 Stamp sets from the release.


To make these cards, I started with Kraft card stock which I cut it out approximately quarter inches less than than A2 size card base. For Deer cards, I stamped the image using Versamark ink and hear embossed it using Ranger's White Embossing powder.


And for Gingerbread Village cards, I first stamped it with Candid Apple colored Distress Oxide. Then, I heat embossed it using White Embossing Powder. I'm sharing a step by step video tutorial here at my channel to show you how I made this easy Kraft Christmas cards which can be easily mass produced to build your Christmas Cards stash....


Once done with embossing, I mounted these Kraft card panels to Limited Edition - Mercury (Metallic Burgundy) Card stock using glue.


For the final touch up, I added some matching gems to complete this card.


I hope you feel inspired to get creative today!. Thank you so much for stopping by!


Hugsxx 
Deepti Aggarwal

Wednesday 28 July 2021

InkyStamper Stamps - Frosty & Fabulous

Hello Everyone,

I'm stopping by to share my final GD post for InkyStamper's Facebook Group. I'm so thankful to Chelsea  & Kim for this wonderful opportunity. I really enjoyed my time with them and the team. For my final post, I made this Slimline Christmas Card using InkyStamper "Snowman" & "Snow Angel" stamp set.

Over to my card...


To start with, I took Slimline card panel and die cut it out using circle dies and stamped the snowflakes using Tumbled Glass Distress ink because I want to keep the background very light and mostly on white side only. Once done with stamping , I adhered this panel to White card base.
 

Meanwhile, I stamped the images using Black Nuvo Ink from the InkyStamper store and colored these images using alcohol markers and die cut it out using coordinating dies.


Adhered these images  and die cut out stamped snowflakes using foam tape along with stamped sentiment.


I added some Picket Fence Day & night Gems from the store to complete this fun Holiday Card.


I hope you like it. Thank you so much for stopping by!

Hugsxx
Deepti Aggarwal

Sunday 25 July 2021

Kinda Cute by Patricia - Seahorse Card

Hello Everyone,

I'm stopping by to share my DT Post for Kinda Cute by Patricia. I made this card for their Facebook Progressive challenge. If you participate with any of her image (She is offering lots of free images too in her FB group) then next month you will get one image free along with the chances of winning 3 digital images of your choice.

For this card,  I have used this cute Digi set called 'Seahorse'  which was free for those who have participated in the last challenge. Join Kinda cute by Patricia FB group for more details.

Over to my card..


To make this card, I took white card stock and ink blended it using shades of Blue, Sea Green and brown Distress inks. Once satisfied, I stenciled it with Funky Fossil Designs Woodgrain Background Stencil using White same Distress inks to add some interest. Then I splattered it with White Acrylic paint.


Meanwhile, I printed this cute digis, colored these with Alcohol markers and fussy cut it. I adhered it to the  card panel using foam tape.


I stamped the sentiment from Kinda Cute Under the sea Sentiments Digital Stamps  to complete this card. I really like how this card turned out. I hope you like it too.

Thank you so much for stopping by!!

Hugsxx

Deepti Aggarwal

Crealies - Love You Slimline Card

Hello Everyone,

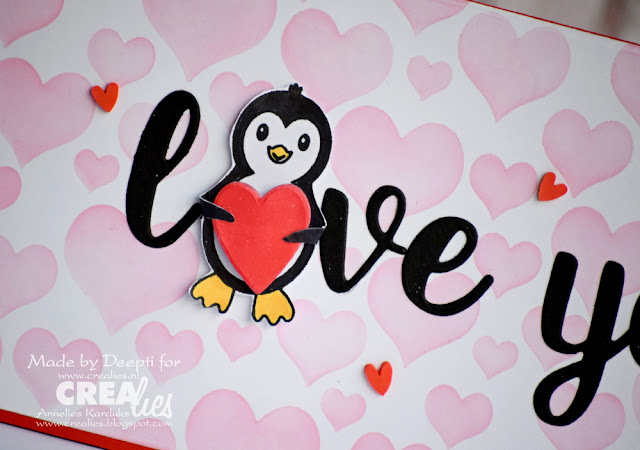
I'm stopping by to share this cute slimline Love you card using the cute Penguin and latest Heart stencil. Isn't this little guy cute??

Over to my card...


To make this card, I took white cardstock and die cut it out using Crealies Plain slimline dies. Then I secured the Heart stencil on this die cut out panel using non permanent tape and stenciled it with pink color Distress ink.


I adhered this stenciled panel on red colored card base. Meanwhile, I stamped this cute penguin which I colored using alcohol markers and fussy cut it. I added the die cut out heart using foam tape and made him hold it by folding his hands.


After that, I die cut out the sentiment using Alfies dies and adhered it the card panel along with Penguin. 


I added some heart embellishments to complete this card. I hope you get inspired.

Thank you so much for stopping by!! 

Hugsxx
Deepti Aggarwal

I have used following Crealies products:

Crealies Dies / Stansen:
       
  
       Stamping cardstock, white 240 grams (20x A4)     

Wednesday 21 July 2021

InkyStamper Stamps - Magnetic Bookmarks

Hello Everyone,

I'm stopping by to share these fun Magnetic Bookmarks using InkyStamper's Stamps & coordinating dies.. I really enjoyed making these Bookmarks for my 9 years old and  her friends . And it was her idea to gift it without coloring so that her friends can do the coloring. Hmmm .. Brilliant idea.. ;) Isn't it ??

I have a photo tutorial too.. (Beware... It's a picture heavy post..)


We have made around 20 of them and these are the ones those are left... ;)


This is how I made these..

I  first stamped the InkyStamper images on white card stock and die cut it out using their coordinating dies.


Then I colored the image and adhered it to the folded card stock.


After that, I fussy cut it leaving it intact from the folded side.


I added the sentiment on the back side  which I first stamped on white card stock and fussy cut it. I distress inked the edges just to add interest.


Finally, I adhered magnetic tape inside as shown in the pic.


Ta da... Our super easy magnetic Bookmarks are ready.


Here are some more clicks..


I hope you like it. Thank you so much for stopping by!

Hugsxx
Deepti Aggarwal

Monday 19 July 2021

Crealies Inspiration Blog Relay Day - Slimeline Christmas Card - Video Tutorial

Hello Everyone,

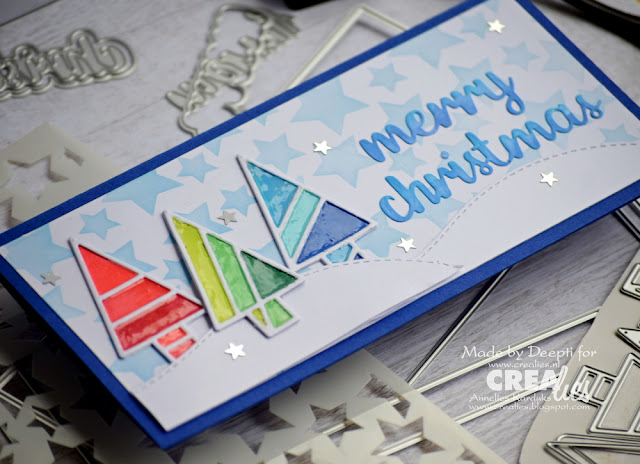
I'm stopping by to share this Slimline Christmas Card using Crealies latest release which has lots of products to build your Christmas Cards stash. And If you love Geometric Patterns then I guarantee you will fall in love with this wonderful release.

Over to my card..


To make this card, I did some stenciling and lots of die cutting ;). For the trees, I tried to give it a Faux Stained Glass look.

Here is the close up...


I have a step by step video tutorial to show you how I made this card. Hop over to my YouTube channel or click the video below to see how I made it..


I really love Geometric patterns and enjoyed making this slimline Christmas card using Geometric Trees.


I hope you get inspired.


Thank you so much for stopping by!! 

Hugsxx
Deepti Aggarwal

I have used following Crealies products:

Crealies Dies / Stansen:

Crealies Mixed Media:

Crealies Basic:

     
     Stamping cardstock, white 240 grams (20x A4) 


Wednesday 14 July 2021

InkyStamper Stamps - Sorry to be a pill

Hello Everyone,

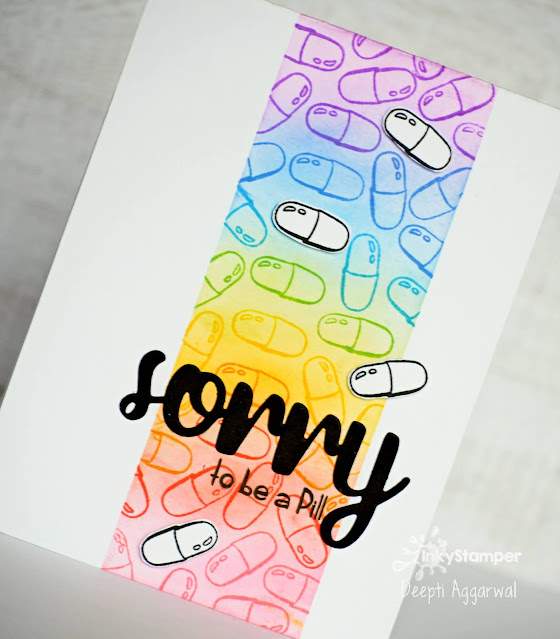
I'm stopping by to share this rainbow colored Sorry card using InkyStamper's Roly Poly stamp set. Have you ever made Sorry Cards ??? I made this card for my Hubby ;) Yes.. He is the one whom I annoy the most.

Over to my card..


To make this card, I took A2 size White Card base. I masked it from both the vertical ends and ink blended it using rainbow colored Distress Oxides. Once satisfied, I took this capsule image from Roly Poly stamp set and stamped it over the ink blended part using the same Distress Oxide color.
 

Then, I removed the mask and added die cut out Sorry sentiment using Crealies Alphabet dies. I stamped rest of the sentiment directly on the cardstock and traced it again to make it more darker.

To add interest, I stamped some more capsules on White cardstock and adhered it to the card base using foam tape. 

I hope you like it. Thank you so much for stopping by!

Hugsxx
Deepti Aggarwal

Tuesday 13 July 2021

Crealies Inspiration Blog Relay Day 1 - Merry Christmas

Hello Everyone,

I'm stopping by to share this interactive Pop Up Slider Christmas Card using Crealies latest release. It's so much fun to make interactive cards. Isn't it? :)


To make the card base for interactive part, I've followed Mandy's Video which you can find hereI've die cut it pattern paper using Crealies stitched rectangle dies of size 3.75 by 5.25 inches. and adhered it to the white card base. 


To decorate this card, I die cut out big Christmas Trees using Cardzz Christmas Tree dies and  trimmed its base and adhered to the front panel. Then I die cut out lots of small trees using Uno and set of 3 dies and adhered to the card base.


I further decorated the Big Christmas tree with designer lace & stars from the same die set which I colored using Distress Oxides. I also colored the big tree with Pearl White Silver pigment color to highlight the tree.
 

Then, I stamped the snowman, colored it with Alcohol markers and fussy cut it. I adhered it the card panel using foam tape. I also stamped the pull tab panel with Christmas trees to add interest and added the thread to make it easy for the recipient to interact with the card.


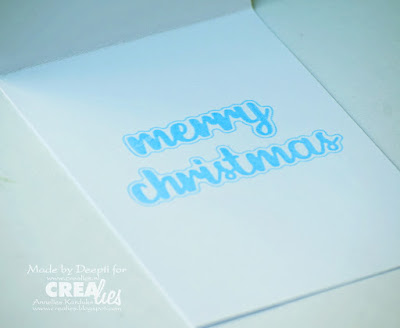
Finally I stamped the big "Merry Christmas" sentiment inside of the card using Blue Distress Oxide color to complete this fun Pop Up Slider Card.


I hope you get inspired.

Thank you so much for stopping by!! 

Hugsxx