Wednesday 29 September 2021

Maker Forte - Fall Mixed Media Card (Video Tutorial)

Hello Everyone, 

I'm at Maker Forte Blog with this One layered Mixed Media Card. Before I start.. I want to ask you :) ... Do you get intimidated by Mixed Media Cards?? If your answer is Yes...then this post will help you get started easily. In today's video tutorial, I will be showing you how to make this Clean & Simple One Layered Fall Mixed Media card by adding lots of depth & texture using Distress ink & stenciling.


To make this card, I've used Maker Forte Stencil - Blustery Day designed by Jess Francisco , and for stamping I've used 'Bear with me' and 'Love' Stamp set designed by Jess Francisco & Alex Syberia respectively. I have put a video together to show you a step by step process here at my YouTube channel..


I started with creating the background, for that I've used 'Spiced Marmalade', 'Wild Honey' 'Mowed Lawn' 'Picked Raspberry', 'Crushed Olive', 'Peeled Paint' and 'Vintage Photo' Distress Inks. s. I've used Make Forte - Mister Perfect Spray Bottle to activate the Distress Ink. Once done with ink smooshing I splattered this panel using same Distress Ink colors.


After that, I randomly stenciled this panel using Maker Forte Stencil - Blustery Day with same Distress Ink colors. Once satisfied, I stamped it randomly with a fall leaf from 'Bear with me' stamp set designed by Jess Francisco using same Distress Inks.


Then I stenciled it with Texture paste using Blustery Day stencil and let this panel air dry. Once it dried, I stamped the sentiment from Maker Forte - Love Stamp set designed by Alex Syberia using Eclipse Black -Color Hive Ink Pad .


I mounted this panel on Maker Forte - English Mustard Card stock using glue. Finally I embellished it with Maker Forte Aura -Crown Jewel Gems to complete this card. I hope you feel inspired to get creative today!. Thank you so much for stopping by!

Hugsxx 
Deepti Aggarwal 
( Blog | Facebook | Instagram | YouTube )

Disclaimer - Links used in this post are affiliate links, meaning, at no additional cost to you, I will earn a small commission if you click through and make a purchase. Thank you for your support.

Playing along with:
Time Out Challenge #197 - Inspired by word Friend
As You Like It Challenge - Favourite: Autumn or Winter - I love Autumn because of beautiful colorful leaves all around. 

Monday 27 September 2021

Kinda Cute by Patricia - You bring me HAPPINESS!!

Hello Everyone,

I'm stopping by to share my DT Post for Kinda Cute by Patricia. For this card,  I have used this cute Digi set called 'Baby Elephant'  which includes three cute Baby Elephants in different poses.

Over to my card..


To make this card, I took A2 size white card base and masked it using masking tape to make this Rainbow Shower for this cute little Elephant. I ink blended it using rainbow color Distress Inks. Once done with ink blending, I splattered with water to add interest. Then I stenciled it using White ink to add bubbles. And further added the details using White pen.


Meanwhile, I printed these cute digi, colored it with Alcohol markers and fussy cut it. I adhered these to the card panel using foam tape along with washi tape.


I stamped the sentiment from Neat & Tangled "Happiness" stamp & die set using my stamping tool. Finally I added Glossy Accent to some bubbles to add texture. I really enjoyed making this fun card. I hope you like it too.

Thank you so much for stopping by!!

Hugsxx

Deepti Aggarwal

Sunday 26 September 2021

Congratulations for Your New Home!

Hello Everyone,

I'm stopping by to share this Congratulations Card which I've made for our Friends who recently bought a new house.. :). I really enjoyed creating this little scene. I hope they liked it.

Over to my card..


To make this card, I die cut out all these elements using Love2Craft dies from Action on White Card stock. Then, I colored these using Distress Inks .


After that, I took White card base and ink blended it with Green & Blue Distress Inks to depict Grass & Sky respectively by masking it. I arranged all the ink blended elements using foam & glue to give it some dimension.


Then, I added the stamped sentiment along with the hand written sentiment to complete this card. I hope you like it.

Thank you so much for stopping by!!

Hugsxx

Deepti Aggarwal

Friday 24 September 2021

Crealies - Poinsettia Christmas Card

Hello Everyone,

I'm stopping by to share this mini slimline Poinsettia Christmas card using latest released Poinsettia dies along with Mix & match zig zag stripe dies.


To make this card, I first die cut out the White cardstock using Outermost & Innermost Mini Slimline dies. Then, I dry embossed the innermost layer using Zig Zag Stripes dies to add some texture to the cardstock. I adhered this embossed cardstock to outermost layer and mounted the same on white card base.


After that, I die cut out the Flowers layers & leaves using Poinsettia dies and Holy Leaves dies respectively. I  I ink blended these die cut out using Distress Oxides. Then, I arranged the flower & leaves on card panel and adhere it using glue.


Then I die cut the Christmas sentiment on Gold glitter cardstock and glued it to the panel.


Finally, I added Gold Nuvo drops at the center of the flower along with some gold sequins to complete this beautiful Christmas Card. 

I really enjoyed making this Christmas Card. I hope you get inspired.

Thank you so much for stopping by!! 

Hugsxx
Deepti Aggarwal

I have used following Crealies products:

Crealies Dies / Stansen:

Friday 17 September 2021

Kinda Cute by Patricia - Mission Control- It's your Birthday!!

Hello Everyone,

I'm stopping by to share my DT Post for Kinda Cute by Patricia. For this card,  I have used this cute Digi set called 'Alien'  which includes some cute Extraterrestrial monsters and a spaceship along with a moon and some clouds.

Over to my card..

To make this card, I took white card stock and adhered this ink blended Galaxy Background which I cut out wavy using a pair of scissors. For the Galaxy background, I took my rough card stock which I always keep down while I do inking for my background or images. So making Galaxy cards are so easy and fun... You can check all my Galaxy Cards here.


Meanwhile, I printed these cute digis, colored it with Alcohol markers and fussy cut it. I adhered these to the card panel using foam tape.


I stamped the sentiment on white Card stock and fussy cut it too. I really enjoyed making this fun card. I hope you like it too.

Thank you so much for stopping by!!

Hugsxx

Deepti Aggarwal

Thursday 16 September 2021

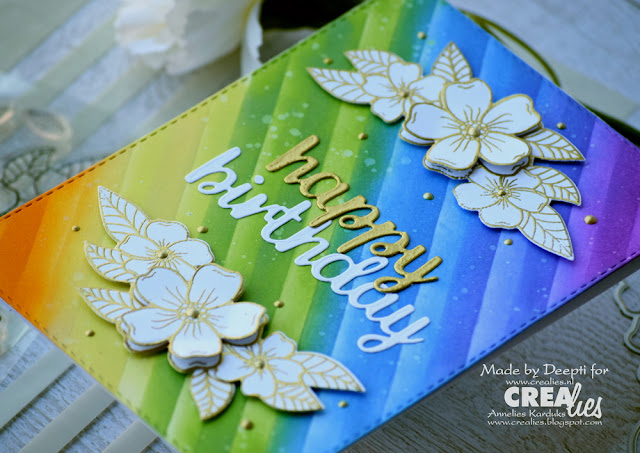
Crealies - Rainbow Colored Floral Birthday Card

Hello Everyone,

I'm at Crealies blog with this Rainbow colored Floral Birthday card using Crealies latest released "A Perfect Match" stamps & dies along with new Stripes Stencil. 

Over to my card..


I've used couple of techniques to make this single card. For instance, I've used stenciling & ink blending for the background. And for the focal image, I did stamping, die-cutting  and heat embossing :).Here is the close up of my card..


And I have a step by step video tutorial to show you how I made this rainbow colored Floral Birthday card. Hop over to my YouTube channel or click the video below to see how I made it.


I love rainbow colors and really like how this card turned out. I hope you like it too.


Thank you so much for stopping by!! 


Hugsxx
Deepti Aggarwal

I have used following Crealies products:

Crealies Dies / Stansen:

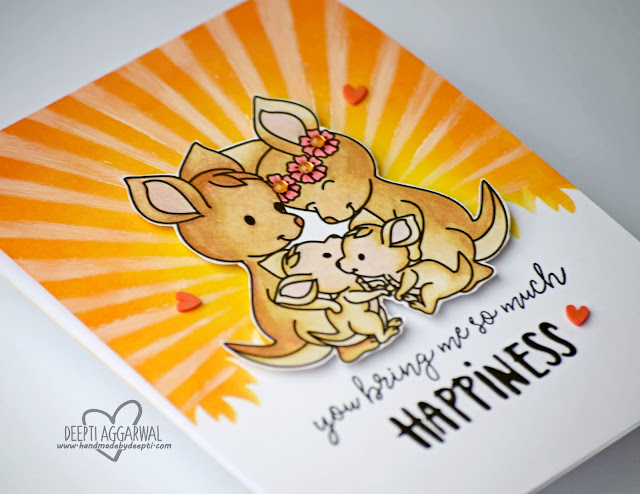
Magengo Designs - You bring me HAPPINESS!!

Hello Everyone,

I'm stopping by to share this cute Kangaroo Love card using Magengo Designs Cute digital stamp set called "Australian Hugs" . I won this digital stamp set a couple of months back in her Instagram giveaway and finally I got the time to color these cute Kangaroo family :). Isn't this digi cute??

Over to my card..


To make this card, I took A2 size White card base, masked the lower one third of the card panel using Maker Forte Stencil - Grass -Varada Sharma and Ink blended it using Distress Oxides. Then I further stenciled it using Sunburst stencil from Craftscrappers with White ink.


Meanwhile, I printed this cute digi, colored these with Alcohol markers and fussy cut it. I adhered it to the card panel using foam tape.


Then, I stamped the sentiment from Neat & Tangled "Happiness" Stamp & Die set. Finally I added some Heart embellishments to complete this card.

I hope you get inspired.

Thank you so much for stopping by!

Hugsxx
Deepti Aggarwal

Playing along with:

Monday 13 September 2021

Maker Forte - Bubbling with Excitement Gnome Card

Hello Everyone, 

I'm at Maker Forte's Blog with this fun Rainbow Colored Gnome card using Maker Forte 'Bubbling with Excitement' Stamp Set.


To make this card, I took White Cardstock (which was half a centimeter less than A2 size Card stock) and masked it using post it notes leaving one & half inch white space from below. 


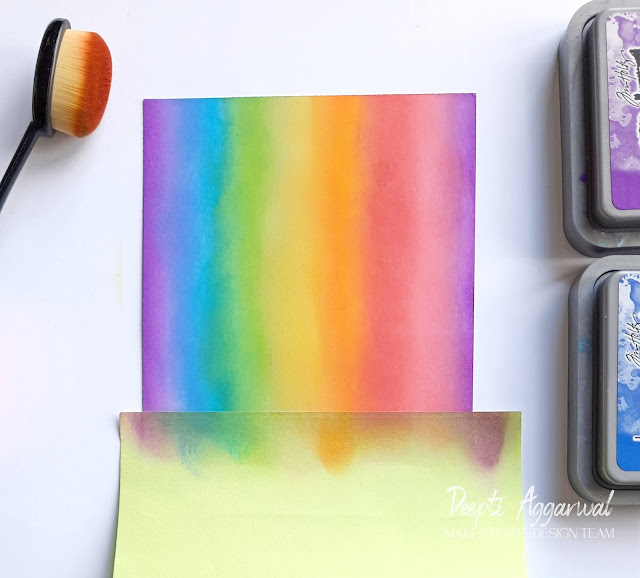
Then I ink blended it using Rainbow colored Distress Oxides. For that, I’ve used Wilted Violet, Blueprint Sketch, Salty Ocean, Mowed Lawn, Squeezed Lemonade, Carved Pumpkin, Candid Apple and Worn Lipstick Distress Oxides respectively.


Once satisfied with ink blending, I applied anti-static powder & heat embossed it with White Embossing Powder using bubbles from the stamp set.


Then, I splattered it with water to add some interest. I mounted this embossed panel to the A2 size White Card base and stamped the sentiment using Colorhive Eclipse Black Ink.


Meanwhile, I stamped this cute Gnome on White cardstock using Colorhive Eclipse Black Ink. I colored this image using alcohol Markers and fussy cut it. I adhered this colored image using foam tape to the card panel.


Finally, I added some white gemstones to complete this fun card. I really like how this card turned out with embossed rainbow background.


I hope you get inspired. Thank you so much for stopping by.
Hugsxx 
Deepti Aggarwal 

Playing along with: