Showing posts with label Mixed Media. Show all posts

Monday, 31 October 2022

Customized Name Plate

Hello Everyone,

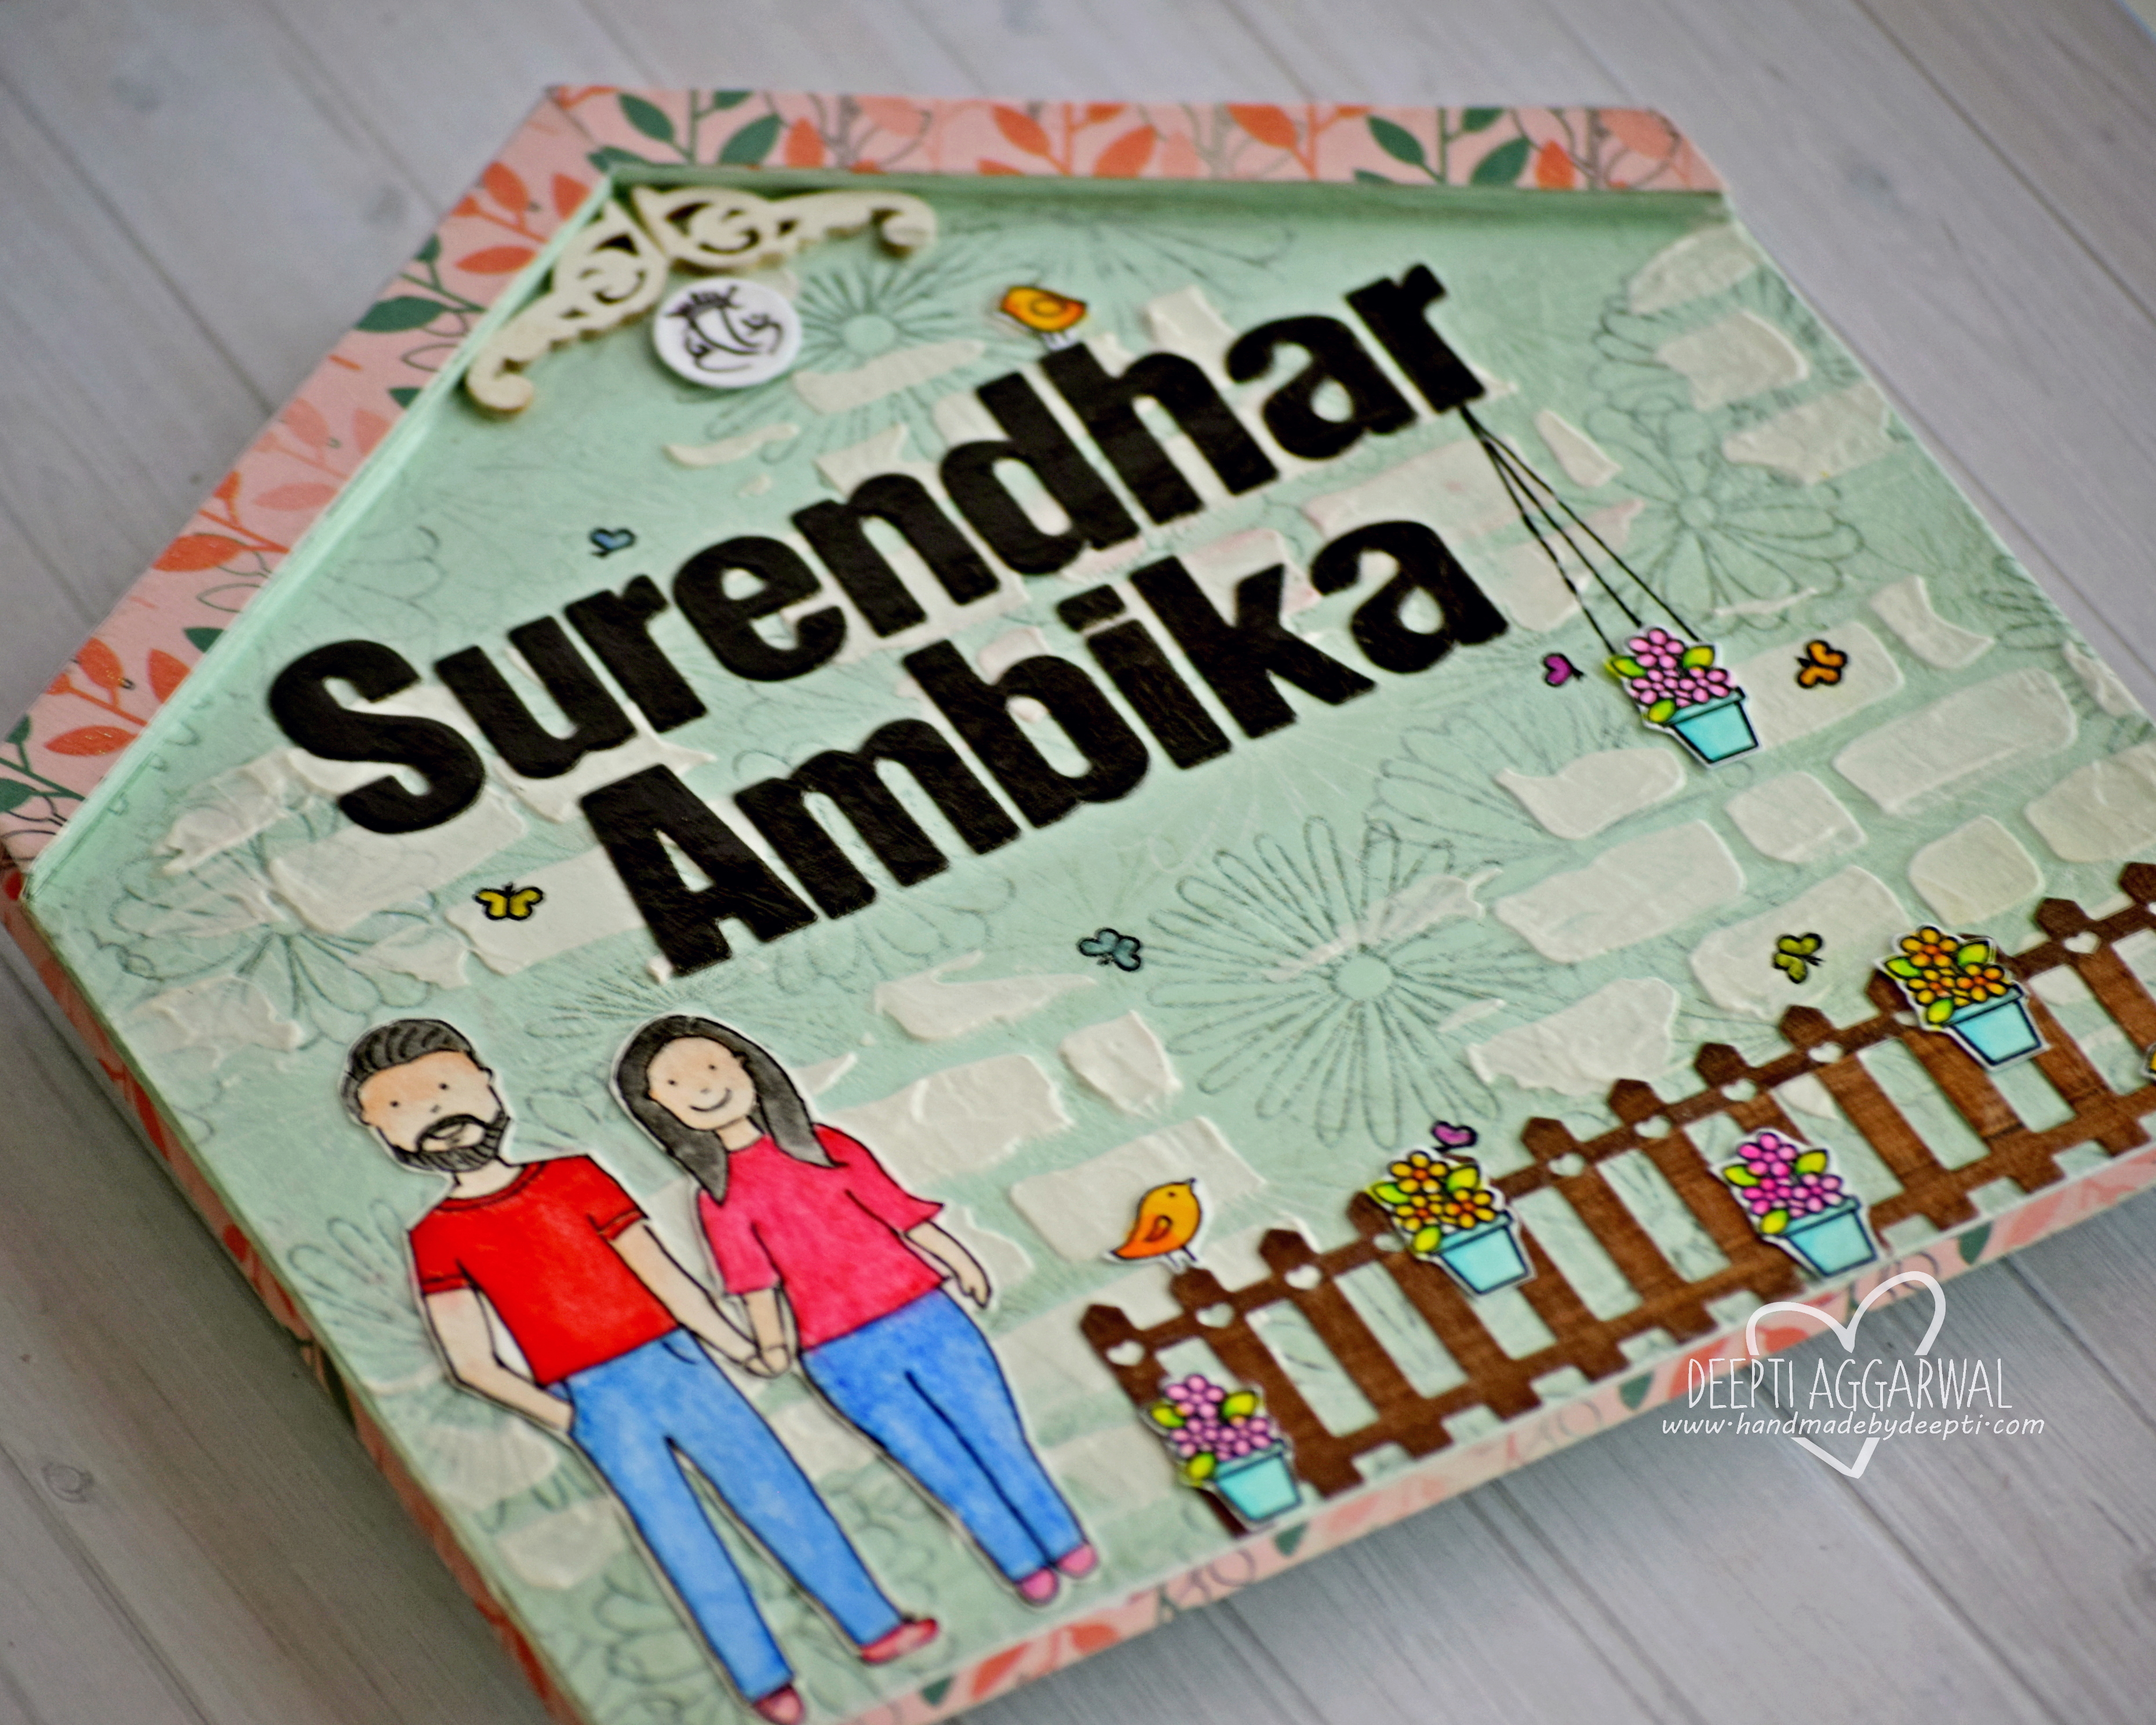
Here is my quick post....I'm stopping by to share this customized name plate which I've made on request for a friend.

I've used products from different companies to put this piece together. The illustration of the couple is drawn by me which I colored with watercolor and fussy cut it. 

Here is the close up..

Some more clicks..

I really enjoyed making this customized Home Decor piece for a friend.. 


Thank you so much for stopping by!!

Hugsxx
Deepti

Playing along with:

Friday, 18 February 2022

Customized Name Plate


Made this customized name plate for a client. Cute family figures are hand drawn :) Approximate size of this name plate was 8 by 4 inches.

For you queries/custom order mail me at handmadebydeepti@gmail.com

Wednesday, 29 September 2021

Maker Forte - Fall Mixed Media Card (Video Tutorial)

Hello Everyone, 

I'm at Maker Forte Blog with this One layered Mixed Media Card. Before I start.. I want to ask you :) ... Do you get intimidated by Mixed Media Cards?? If your answer is Yes...then this post will help you get started easily. In today's video tutorial, I will be showing you how to make this Clean & Simple One Layered Fall Mixed Media card by adding lots of depth & texture using Distress ink & stenciling.


To make this card, I've used Maker Forte Stencil - Blustery Day designed by Jess Francisco , and for stamping I've used 'Bear with me' and 'Love' Stamp set designed by Jess Francisco & Alex Syberia respectively. I have put a video together to show you a step by step process here at my YouTube channel..


I started with creating the background, for that I've used 'Spiced Marmalade', 'Wild Honey' 'Mowed Lawn' 'Picked Raspberry', 'Crushed Olive', 'Peeled Paint' and 'Vintage Photo' Distress Inks. s. I've used Make Forte - Mister Perfect Spray Bottle to activate the Distress Ink. Once done with ink smooshing I splattered this panel using same Distress Ink colors.


After that, I randomly stenciled this panel using Maker Forte Stencil - Blustery Day with same Distress Ink colors. Once satisfied, I stamped it randomly with a fall leaf from 'Bear with me' stamp set designed by Jess Francisco using same Distress Inks.


Then I stenciled it with Texture paste using Blustery Day stencil and let this panel air dry. Once it dried, I stamped the sentiment from Maker Forte - Love Stamp set designed by Alex Syberia using Eclipse Black -Color Hive Ink Pad .


I mounted this panel on Maker Forte - English Mustard Card stock using glue. Finally I embellished it with Maker Forte Aura -Crown Jewel Gems to complete this card. I hope you feel inspired to get creative today!. Thank you so much for stopping by!

Hugsxx 
Deepti Aggarwal 
( Blog | Facebook | Instagram | YouTube )

Disclaimer - Links used in this post are affiliate links, meaning, at no additional cost to you, I will earn a small commission if you click through and make a purchase. Thank you for your support.

Playing along with:
Time Out Challenge #197 - Inspired by word Friend
As You Like It Challenge - Favourite: Autumn or Winter - I love Autumn because of beautiful colorful leaves all around. 

Friday, 4 June 2021

STAMPlorations - Smile Mixed Media Card

Hello Everyone,

I'm stopping by to share this Mixed Media Card where I experimented with my Alcohol Markers on Photo Paper. I've used STAMPlorations dies and Stencil to make it.

Over to my card,


To make this card, I took photo paper and created the alcohol background using Pink & Purple shades of Alcohol markers. I added some gold powder too  while creating the background. I have a step by step video Tutorial for this card here at my YouTube channel..


Once satisfied with the background, I die cut it out using Crazy Double Running Stitch Rectangle Nesting Dies - CUTplorations. Then I stamped it using scripts stamp from my stash.


After that, I stenciled it with modelling paste using Peony Number Two - ARTplorations Stencil. Once it dried, I added die cut out Smile Word Die - CUTplorations which I layered. 


Finally Added some gold sequins to complete this card. I really like how this card turned out. I hope you like it too.

Thank you so much for stopping by!!

Hugsxx
Deepti Aggarwal

Playing along with:
STAMPlorations Spring Fling Blog Hop and Linky Party

Friday, 15 January 2021

Customized Name Plate

Hello Everyone,

I'm stopping by to share this customized name plate which I made on order for my friend a couple of months back. Finally I got time to publish it ;)... 


This is 4 by 12 inches name plate with lots of texture and detail. . I have used Faber castell leaf stencil with texture paste and shades of blue acrylic paint for the background.


Once satisfied with background, I added flowers and leaves from STAMPlorations Trendy Spring Bloom dies  along with their Birds dies.


Finally added the die cut out name along with a layer of Modge Podge to complete it. I really like how this name plate turned out and  love this color combination so much. I hope you like it too.


Feel free to mail me if you want one for your home :)


Thank you so much for stopping by!

Hugsxx
Deepti Aggarwal

Playing along with:


Friday, 25 December 2020

Christmas Bauble using InkyStamper Deer Stamp

Merry Christmas Everyone, Wish you all a Happy and Healthy year ahead. 

I'm stopping by to share this Christmas Bauble which is adorning my Christmas Tree this year. This is my first handmade Christmas Bauble which I made using  InkyStamper's stamp set called "Deer". I really had fun making this one. It looks so magical to me :)


To make this, I hand cut out the white thick cardstock of the same size as of my bauble. Then I ink blended it using Purple Distress Oxide. Meanwhile, I stamped and colored the images using alcohol marker.

Then, I added the landscape for tree by tearing white card stock and adhered the same using foam tape. Added the tree using glue. For the deer, I wanted to give some gap between background and the image so for that, I added the deer on the background using clear acetate strip. 

Added some fake snowflakes and silver sequins before gluing clear bauble. Make sure you use strong glue to adhere the bauble on the cardstock. I have used Glossy accent for the same.

I hope you like it. Thank you so much for stopping by!

Hugsxx
Deepti Aggarwal 

Friday, 27 November 2020

Slimline Mixed Media Holiday Card - Hedgehog Hollow November Subscription Box

ello Everyone, 

I’m at Hedgehog Hollow blog with another post using the November Subscription box. Today, I'm sharing a slimline CAS Mixed Media Holiday card using "Believe" stencil from Maker Forte which was included in this month subscription box. Have you ever tried Mixed Media cards ? If not, then this post will give you some courage ;).. It's so easy and fun to play with different inks and there is absolutely no chance of making mistakes :)

To start with, I die cut out Watercolor card stock panel using Crealies Slimline Dies . Then, I Ink blended it using Mowed Lawn, Candid Apple and Carved Pumpkin Distress Oxides. Now the fun part, I ink smooshed this ink blended panel using same Distress Oxide colors. Every time I smooshed the color on the panel, I dried it using Heat tool to get the grunge effect. I repeated this process till I was satisfied. 

After that, I stamped this panel randomly with "Oh Holy Night" sentiment and star from Nativity stamp set using Black Archival ink. Here is the tip, don't use stamping pad for stamping, just do it with your hands to add interest.

Then, I partially stenciled this panel using same Distress Oxide colors where I added Ornaments at the top and stars randomly using Believe Stencil.

Once satisfied with the background, I stenciled only the "Believe" part from the stencil using Pebeo Modeling paste and masked rest of the stencil with washi tape.

Once the panel dried, I mounted it on white card base and added some silver sequins for the final touch up. I really enjoyed making this fun Mixed Media slimline card. I hope you like it too.

Don’t forget that you can share your projects on The Hedgehog Hollow Box Facebook group as well as Stamping at the Hedgehog Hollow Facebook group. We would love to see what you are creating with this wonderful box. If not, then you can shop your Hedgehog Hollow box now.

Thank you so much for joining me today . I’ll be back here soon.

Hugsxx

Deepti Aggarwal ( Blog | Facebook Instagram | YouTube )

Saturday, 7 March 2020

Crealies Blog relay day 9


Hello Everyone,

It's Day 9 of the blog relay. Yesterday we were able to admire the beautiful creation of Wilma, today it is my turn.

I'm so excited to share this steampunk MDF Heart using new release. It is completely inspired by Hindu festival called "Holi" ( my international friends can click the link to know more about this festival) also known as "festival of  colors" ,"festival of love" or "festival of spring" which is celebrated in the month of March and this year we are celebrating it on 10th March...😊

Over to my project..


To start with, I covered heart shaped MDF with white gesso. Once it's dried, I stenciled it using stencil paste. 


Then I die cut out all the elements like heart, gears ,clock etc and arranged the same on the top of the MDF and adhered them using transparent gel medium and again covered everything with white gesso.


Now the fun part, I started coloring it with rainbow liquid colors and did that till I was satisfied. To add some interest, I added white and gold acrylic paint to highlight some of the parts and stamped the gears using black archival ink.


Finally , I covered it with glossy varnish to protect it.


I hope you get inspired.

Thank you so much for stopping by!!

Tomorrow Jolanda will show you what she has made with 
the new products of the month March. 

Hugsxx