Thursday 22 April 2021

Maker Forte - Quick & Easy Mother's Day Cards

Hello Everyone, 

I'm at Maker Forte's Blog with these two quick & easy Mother's Day card using Maker Forte Printed Pattern Papers. To make these cards, I've used Flower Power (4"x8") Printed Paper in collaboration with The Hedgehog Hollow and All Seasons Sentiments (6" x 6") Printed Paper in collaboration with Jess Francisco.

Quick & Easy Mother's Day Cards using Pattern paper

Card 1

Easy Mother's Day Cards with pattern paper

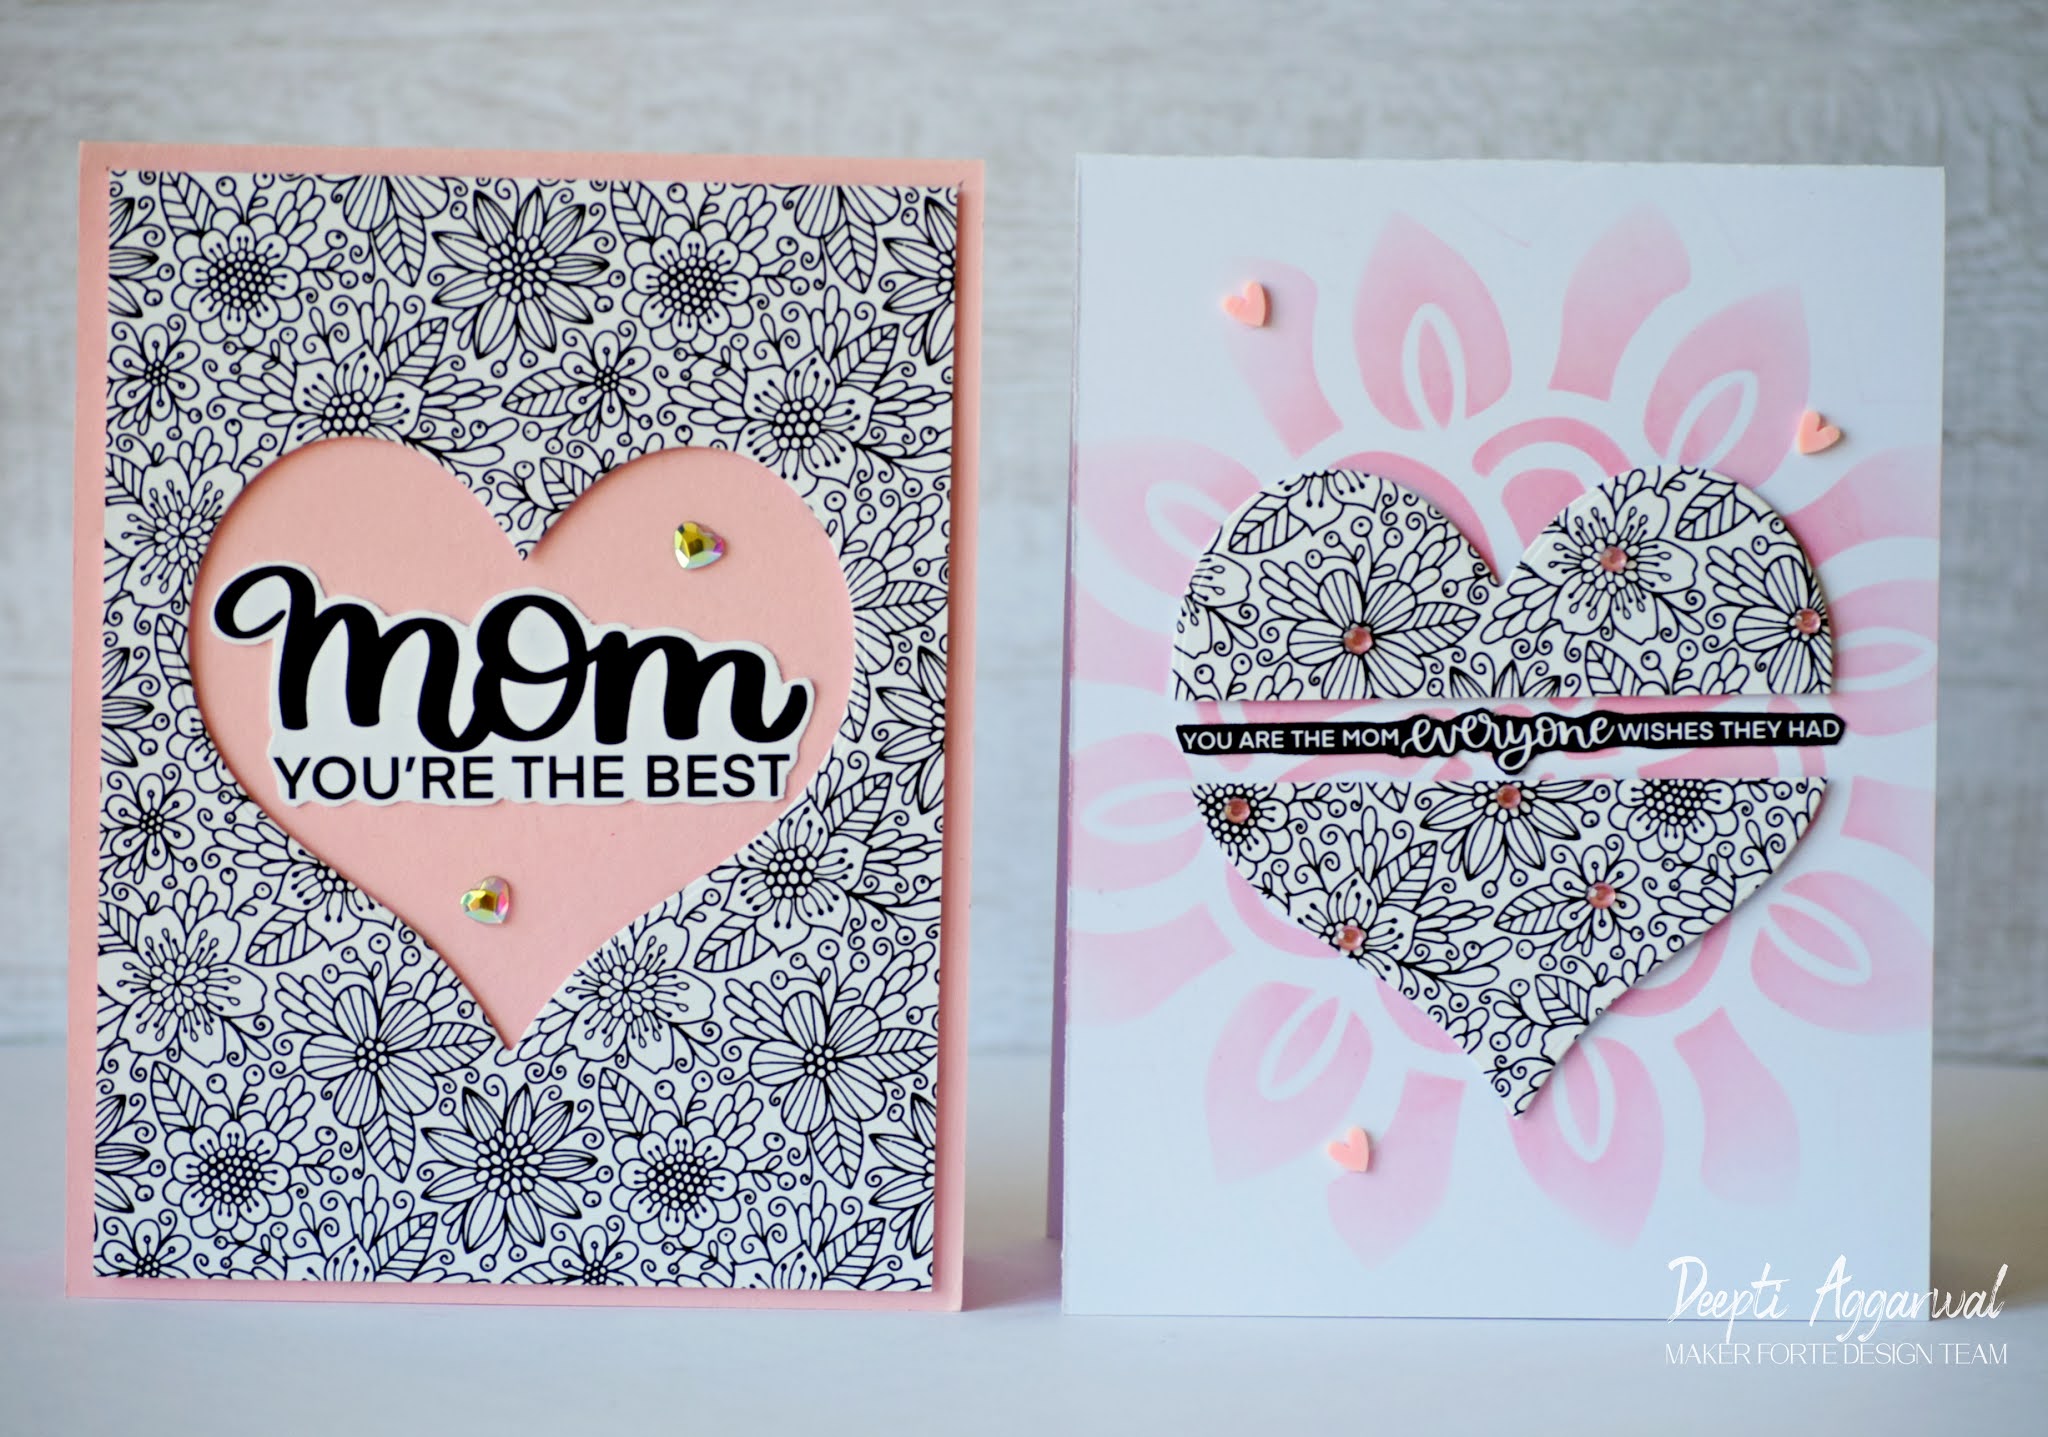
For this card, I took Flower Power Slimline Printed Paper and trim it to 5.25 inches size. Then, I die cut out the heart using Heart Dies. After that, I mounted this die cut out panel on A2 size Colored Cardstock from Maker Forte using Foam tape to give some dimension.

Mother's Day handmade Card

Then, I fussy cut out the sentiment from All Seasons Sentiments (6" x 6") Printed Paper for this Mother's Day card which says "Mom you are the best". I really love this paper pad as you can quickly cut out the sentiment you need for your card. 

Mom you are the best Card

I adhered this fussy cut sentiment at the middle of the panel inside the die cut out heart using glue. Embellished this card with Heart shaped Crown Jewels to complete this card. Easy peasy.. Right ??? :)

Card 2

Heart Mother's day card

For this card, I took A2 size White Cardstock and stenciled the background using In Bloom Square Stencil by Jess Francisco with "Worn Lipstick" colored Distress Oxide. Then I fussy cut the sentiment from All Seasons Sentiments (6" x 6") Printed Paper and glued it to the middle of the stenciled card panel.

Stenciled Mother's Day Card

After that, I took die cut out heart from the previous card and cut it in to two halves. I adhered these two parts of the heart around the sentiment using foam tape.


For the final touch up, I embellished this card with gemstones and some hearts to complete it.

Mother's Day Handmade Cards

I really enjoyed making these quick Mother's Day cards. I hope you get inspired. 

Thank you so much for stopping by.

Hugsxx
Deepti Aggarwal

Sunday 18 April 2021

Crealies Quilt Card - Geometric Builder Dies

Hello Everyone,

I'm stopping by to share this Quilt card using Crealies Square element dies. I love playing with these Geometric Builder dies where you can make any pattern of your choice. I got my inspiration from one of the quilt made by my Mother-in-law :). 

Over to my card..


To make this card, I chose pattern paper with some small prints and adhered it to Crealies sticker making sheet. Then, I die cut it out using one of the square pattern dies.


After that, I adhered these pattern paper die cut out stickers in a desired pattern on white card base. I heat embossed the sentiment on black card stock and added to the card base using foam tape to complete this card.


If you want to see how I made this card, Then check this step by step video on my YouTube channel where I've made 2 Geometric cards using Circle dies instead of Squares..


If you like what I create then please support me by subscribing to my channel :)

I hope you get inspired. Thank you so much for stopping by!! 

Hugsxx
Deepti Aggarwal

I have used following Crealies products:

Crealies Dies / Stansen:

Crealies Stamps / Stempels:
Crealies Basic:

 Stamping cardstock, white 240 grams (20x A4)   


Saturday 17 April 2021

InkyStamper Stamps - Happy Bee Day

Hello Everyone,

I'm buzzing by to share this Bee Card using  InkyStamper's stamp called Bee . And I've used pattern paper...😁 This is Gingham 6 by 6 double sided paper pad from Doodlebug Designs which you can find here in InkyStamper's Store and I've used Hexagon dies  from latest release which is part of Mini Envie Dies.

Over to my card..


To make this card, I took white cardstock and ink blended it using 'Wild Honey' Distress ink.
Then, I die cut out the pattern paper  hexagon die from Mini Envie die set and adhered it to the ink blended background.


Meanwhile, I stamped the bee on white carstock using Nuvo Black Hybrid Ink , colored these using alcohol markers and die cut out the bee with coordinating dies.


After that, I adhered this Bee on the card panel with foam tape to add some dimension. I stamped the sentiment using same stamp set and adhered this panel on the Black card base.


Finally, I added some Black gems from Picket Fence's Day & Night Gems collection to complete this card.

I hope you like it. Thank you so much for stopping by!

Hugsxx
Deepti Aggarwal

Thursday 15 April 2021

InkyStamper Stamps - Shaker Card

Hello Everyone,

I'm stopping by to share this colorful Shaker card using InkyStamper's Peacock stamp set for their Facebook Group challenge where the theme is "Sequins". You won't believe.. I made a shaker card after ages... he he he 😁

Over to my card.. 


To make this, I first die cut out circles using circle die which is a part of newly release Mini Envie Die and for the shaker I've used Picket Fence Razzle Dazzle Sequins from InkyStamper's Store. I added ink blended background for the shaker background. 


Meanwhile, I stamped the focal image on white card stock and colored it using Alcohol Markers. Then I die cut it out using coordinating dies and adhered it to the shaker background using foam tape.


Stamped the sentiment using Distress Oxide and adhered the whole shaker panel on orange colored base card to complete it.


I really enjoyed making this fun shaker card after a long time. I hope you like it.

Thank you so much for stopping by!!

Hugsxx
Deepti Aggarwal

Wednesday 14 April 2021

InkyStamper - Flowerette Gift Wrapping

Hello Everyone,

Today, I'm stopping by to share something different... Yes, for the change 'Not a Card' 😉. Before I proceed, I would love to know that Do you love creative gift wrapping ? or Do you love to add that extra touch of customization in the gifts you give it to your family & friends??

I love it and I enjoy it so much. As per my hubby's point of view, it's just waste of effort because people just throw it .. I know.. I know he is right but for me when somebody hold the gift which I wrapped and then that 'Wow' or 'Aha' moment from them is just sufficient for me for all the effort.. he he he..

Enough of talk I think 😜... Let me show you my Gift wrapping project using InkyStamper's latest release Dies.

For my gift wrapping, I love more neutral colors and mostly it's Kraft color wrapping paper or bags or boxes (all Kraft color ;)) along with Jute thread :). For this project, I have used InkyStamper's new released Flowerette Dies and Stitched Circle and Leaves are from Mini Envie dies.

I've added the Flowerette using foam tape to give some dimension. Make sure you use strong glue or glue gun to hold Flowerette in shape. For that I have die cut out 2 circles from Mini Envie dies and adhered it to both the sides of the Flowerette using glue gun. Then I die cut out another circle and stamped the sentiment from  Monkey stamp set and added to the flower using foam tape.

After that, I added white die cut out leaves which I adhered on the back side of the flower. 

I really had fun wrapping this gift. I hope you like it too.

Thank you so much for stopping by!!!

Hugsxx
Deepti Aggarwal

Playing along with:

Tuesday 13 April 2021

Crealies One Layer CAS Card

Hello Everyone,

I'm stopping by to share this One Layer Critter Card using Crealies Blending stencils and cute mini Critter stamp set.


To make this card, I took Crealies White stamping card stock and ink blended these rectangle using no. 3 stencil from the blending stencil set A with Distress Oxides. I'm sure you will love these blending stencils. You can so many backgrounds for your cute images using these.


Then, I stamped the HUGS sentiments using Alfies 3 stamp set on these ink blended blocks. After that I stamped these cute Critters to complete this card. I didn't color these cute animals as I wanted to keep the focus on the colored blocks with sentiment.

I hope you get inspired. Thank you so much for stopping by!! 

Hugsxx
Deepti Aggarwal

I have used following Crealies products:


  Stamping cardstock, white 240 grams (20x A4)   

Friday 9 April 2021

Kinda Cute by Patricia - Ninja Card

Hello Everyone,

I'm stopping by to share my DT Post for Kinda Cute by Patricia. For this card,  I have used this digi called 'Ninja' which includes 3 cute Ninjas. The best part of using digis is that you can resize or invert it as per your choice. I did the same here. I resized these cute Ninjas to approximately 1 inch size and I inverted some of them.

I love how this card turned out... :) Over to my card..

NInja Card using Kinda cute by patricia digital stamp

To make this card, I took white card stock and adhered the washi tape as shown in the below pic to make the square blocks.

Then, I ink blended each square block using Distress Oxides. Once satisfied with ink blending, I peeled off the washi tape. 

NInja Card using Kinda cute by patricia digital stamp

Meanwhile I printed this digis, colored with Alcohol markers and fussy cut it. It was a lot of effort to fussy cut these tiny images but I believe worth the effort ;). Then, I added these images to ink blended square blocks using foam tape.

NInja Card

Finally, I adhered the printed sentiment to complete this card. I really fell in love with these cute Ninjas and enjoyed putting this card together. I hope you like it too.

Thank you so much for stopping by!!

Hugsxx

Deepti Aggarwal

Playing along with:

Sunday 4 April 2021

Crealies Theater Birthday Card

Hello Everyone,

I'm stopping by to share this Theater Birthday card with a twist using Crealies Theater fold dies. To make this fun card, I first make the structure using white card stock. Please follow Mandy's video here at Crealies YouTube Channel to make the same. 

For the twist, I flipped my theatre card which means I kept the strips where you can add images at the top instead on keeping these at the bottom ;)


For this balloon background, I created my own balloon stencil using Crealies transparent sheet and die cut it using balloon dies. Voila... my handmade balloon stencil is ready. Then I ink blended these balloons using rainbow colored Distress Oxide inks as shown in below pic. I also ink blended the front panel using the same stencil.


Then, I added some die cut out ink blended balloons on the white strips to add some dimension to the card. I added die cut out sentiment also which I first adhered to clear transparent sheet and glued it to the balloon. Here is the top view of the card..


Finally, I added die cut out gifts at the front panel of this theater card to complete it. Here is the close up.


This card closes flat to send through post.  This is is how it looks when I closed this theater card..


I hope you get inspired. Thank you so much for stopping by!! 


Hugsxx
Deepti Aggarwal

I have used following Crealies products:

Crealies Dies / Stansen: