Saturday 30 January 2021

InkyStamper Stamps - I Love You

Hello Everyone,

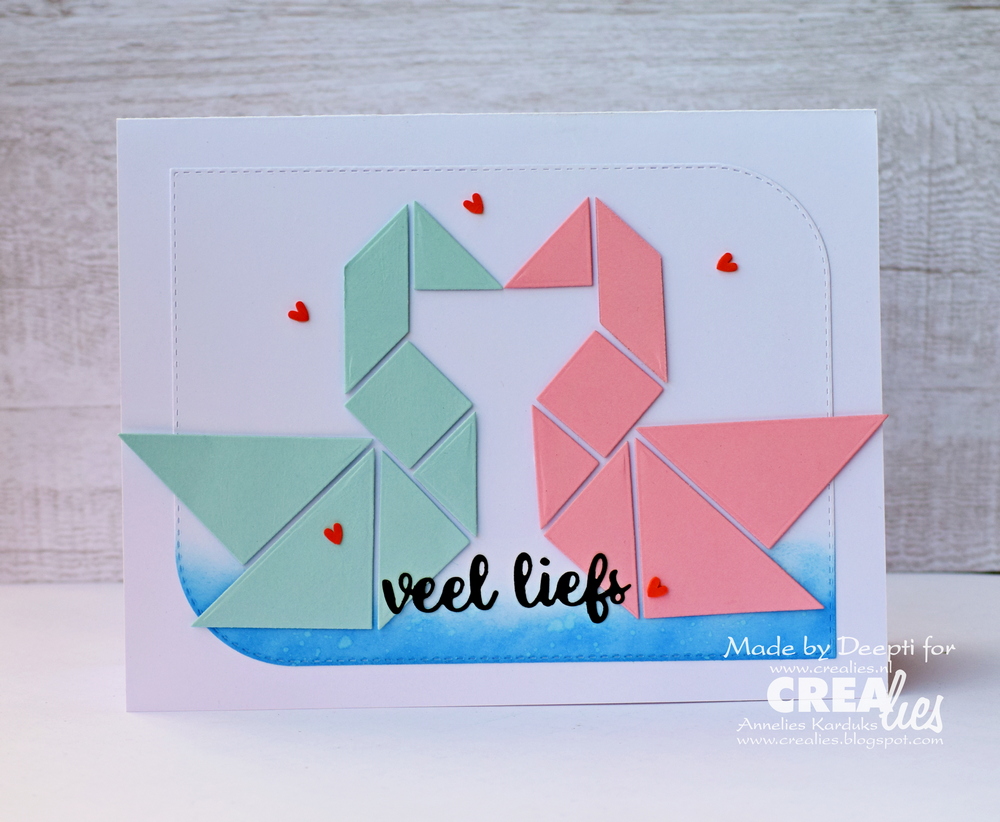
I'm stopping by to share this Valentine's Day card using cute InkyStamper's stamp called Snail which is released this month and now available in the shop.


To make this card, I took A2 size white card base and ink blended the heart using  my home made Heart stencil (Yes, I've made my own stencil by die cutting the basic shapes on Acetate which I normally use like heart, circle , rectangle etc :)). I have used 'Festive Berries' & 'Worn Liostick' distress inks for the ink blending. Then I sprinkled it with water to add interest.
 

Meanwhile, I stamped the images, colored it using Alcohol Markers and fussy cut it. After that I die cut the grass on green car stock and adhered it on the card panel. I adhered all the colored images using foam tape and glue.


Then I stamped the sentiment and fussy cut it too and glued it over the grass. Finally I added some heart embellishments to complete this Love card.

I hope you like it. Thank you so much for stopping by!

Hugsxx
Deepti Aggarwal

Thursday 28 January 2021

Kinda Cute by Patricia - Friends Forever

Hello Everyone,

I'm stopping by to share my DT Post for Kinda Cute by Patricia. For this card,  I have used Digi of the day  called 'Toddler Friends' for the month of January  if you have already bought the January bundle then you might have received it in your email if not then you can find it here..

Patricia has also planned "Digi of the Day" for the month of February. You can buy this bundle of 30 Kinda cute images for just $25. You can find more details about it here.

Over to my card..


To make this card, I took A2 size white card stock and stenciled it using XOXO stencil from CraftyScrappers with distress ink. Once satisfied, I ink blended it using the same colors.


Meanwhile I colored this cute image with Alcohol Markers,  fussy cut it and adhered this image on the card base using foam tape. 


Added printed sentiment which I fussy cut out along with some heart embellishments to complete this card. I hope you like it.

Thank you so much for stopping by!!

Hugsxx

Deepti Aggarwal

Crealies inspiration relay new Crealies products Day 6

Hello Everyone,

As Valentine's Day is approaching ;), I thought of making this simple Love card using Crealies  newly released Nesting and X-tra dies. I really love this X-tra dies which is called Chinese puzzle, it's based on Chinese game called 'Tangram' and the best part is with this single die you can create so many different images. 


If you love geometric patterns then you will immediately fell in love with this die.  


I have a step by step video tutorial too for this card... Hop over to my YouTube channel to watch it..


Here is the close up of the card


 I hope you get inspired.


Thank you so much for stopping by!! 

Hugsxx
Deepti Aggarwal

I have used following Crealies products:

Crealies Dies / Stansen:
    
 
Stamping cardstock, white 240 grams (20x A4)  
      

Tuesday 26 January 2021

Tri-fold Love Card - InkyStamper Bear Stamp

Hello Everyone,

I'm stopping by to share this Tri-fold Love card. It was in my To-Do list from a long time ;). And when Inkystamper's Facebook Group announced the theme for January challenge which was "Fun Fold"... I knew that something is going to be tick marked from my list ;).. I'm so happy that I finally tried it and really loved how it turned out. I've used InkyStamper's stamp set called "Bear".  Over to my card..


To start with, I took A4 size white card stock and marked it 5;5 inches vertically and cut it out and then folded it in to 3 equal parts.


After that, I've used coordinating Bear dies and cut out the Bear in front and second panel of the card exactly at the same place. 


Then, I created different scenes on all the panels using Ink blending and stenciling. I've customized the sentiments using masking technique  from same stamp set. Here is the video..


Here are some close ups... Picture heavy post :)


Close up of middle panel...


Close up of final inside panel...


I didn't imagine that making a fun fold card would be so much fun. I hope you like it. Thank you so much for stopping by!

Hugsxx
Deepti Aggarwal 

Playing along with:


MFT Sketch Challenge )- Galaxy theme Love Card

Hello Everyone,

I'm stopping by to share this quick post where I've used MFT BB Space Explorer stamp set. This card  is inspired by their current Sketch challenge. 

Over to my card..


To make this card, I took A2 size white card base and cut out galaxy background as per the sketch and adhered the same using glue. Check my  this post  to see how I made the galaxy background for my card.. 


After that I stamped the sentiment using Versamark ink & heat embossed it using Ranger's White embossing powder. Then, I added the stamped images which I colored using Alcohol Markers with foam tape.


Finished it by adding some Silver Star embellishment.

I hope you like it. Thank you for stopping by!!

Hugsxx
Deepti Aggarwal

Playing along with:

Wednesday Sketch Challenge - Sketch 525


Book Nerd Window Card - Hedgehog Hollow January Subscription Box

Hello Everyone, I’m at Hedgehog Hollow blog with my another post using January Subscription box. I really enjoyed playing with this Month's box because I have so many Book Lovers in my circle ;). In today's post, I'm sharing this Window Card for a Book Nerd using tone on tone stamping. Over to my card...


To start with, I took A2 size White card base and stamped the sentiments using "Lets have a word" stamp set which came in to the box with 'Cracked Pistachio' Distress Oxide.


 After that, I ink blended this stamped card base using same colored Distress Oxide and splashed it with water to add interest.

Once satisfied, I die cut out the front panel using TCP Balloon Frame Dies. Meanwhile, I stamped my focal image from 'One more chapter' stamp set. I colored this image using Alcohol Markers and fussy cut it.

Then, I adhered this image on the window with glue and stamped the 'Book Nerd' sentiment from the same stamp set. Added some Heart embellishments to complete this Window card.

I also stamped the inside of the card using 'Coffee & Books' stamps set to add interest where I stamped books and coffee using 'Worn Lipstick' & ' Cracked Pistachio' respectively. I really like how this card turned out. I hope you like it too.

Don’t forget that you can share your projects on The Hedgehog Hollow Box Facebook group as well as Stamping at the Hedgehog Hollow Facebook group. We would love to see what you are creating with this wonderful box.

Thank you so much for joining me today . I’ll be back here soon.

Hugsxx

Deepti Aggarwal ( Blog | Facebook Instagram | YouTube )

Playing along with:

Sunday 24 January 2021

Crealies inspiration relay new Crealies products Day 2

Hello Everyone,

I'm at Crealies blog with their new release.  In today's post, I'm sharing this colorful Slimline card with cute critters using newly released dies. I've recently started making Slimline cards and I feel it's totally addictive... :)


To start with, I took A4 size white card stock and folded it in to half vertically  and kept the length 8.5" inches which is a bit bigger than outermost Slimline Cardzz dies. Then I took another white card stock and die cut it using Outer layer and the further die cut it out using Middle layer dies. Once satisfied, I die cut out the circle as shown in the pic below..


Then, I ink blended the outer frame and the die cut out circles using rainbow colored Distress Oxides. I glued the ink blended frame to the card base. 


After that, I added the inner panel using foam tape along with die cut out ink blended circles.


Meanwhile, I die cut out these cute critters on white card stock using Partzz dies and colored these using Alcohol Markers.


Once satisfied with coloring, I glued these die cut out critters on the circle window using foam tape.


I die cut out the sentiment on black card stock and layered it up on vellum which I die cut out using its shadow dies. It's a Dutch sentiment which means "Lots of love".  I glued the sentiment using Glossy accent.

 
Finally, I added some clear sequins to complete this card. 


I hope you get inspired.

Thank you so much for stopping by!! 

Hugsxx

Thursday 21 January 2021

Quick & Easy Watercolored Bookmarks - Video Tutorial

Hello Everyone, 

I’m at Hedgehog Hollow Blog  with my another project using January 2021 Subscription box. In today's post, I'm sharing couple of ways which I normally use to create water colored background for my projects. Though I have used these water colored backgrounds here for making Bookmarks but you can make these backgrounds for adding your stamped images or die cuts or simply for hand lettering.


To make these bookmarks, I took Canson Montval 200gsm Water Color paper and cut it out to a size bigger than the bookmark stamp from Coffee and Books stamp set which I've used for heat embossing. For coloring, I've used Gansai Tambi Water Colors and Water Color Brush Markers to make these bright & colorful backgrounds for my Bookmarks. Hop over to my YouTube Channel to check out step by step video tutorial..


Once I was done with coloring, I cut out the edges using a Paper trimmer and adhered these bookmarks on Kraft Card Stock to make them sturdy.


Finally I added colorful matching thread to complete these Bookmarks. I really enjoyed making these bright & colorful background for my Bookmarks. I hope you get inspired.


Don’t forget that you can share your projects on The Hedgehog Hollow Box Facebook group as well as Stamping at the Hedgehog Hollow Facebook group. We would love to see what you are creating with this wonderful box.


Thank you so much for joining me today . I’ll be back here soon.

Hugsxx
Deepti Aggarwal