Showing posts with label Slimline Card. Show all posts

Monday, 14 February 2022

Crealies - Geometric Heart Card

Hello Everyone,

Happy Valentine's Day!!!

I'm stopping by to share this Love card using Crealies latest released Heart Element Dies. If you love Geometric patterns then I guarantee you will immediately fall in love with this Heart dies. There are couple of designs in this element dies but I have used only one here. 

Over to my card..


To make this card, I first die cut out a slimline panel on White card stock using Crealies outermost Slimline dies with holes. I adhered this panel to Pink Card base which was approx. a centimeter bigger than the front panel.


After that I die cut the hearts on different shades of Pink and Red card stock using Heart Element dies. I glued the Heart border on the card panel as shown in the pic where I moved the alternate hearts  a bit above than the previous one to add interest. Then, I added hearts (which was the part of die cut out) with foam tape to give it some dimension.


Finally, I die cut the sentiment on Gold Glitter sheet using Alfies dies and adhered it to the card panel to complete this Love card.

I hope you get inspired. Thank you so much for stopping by!! 

Hugsxx

Monday, 31 January 2022

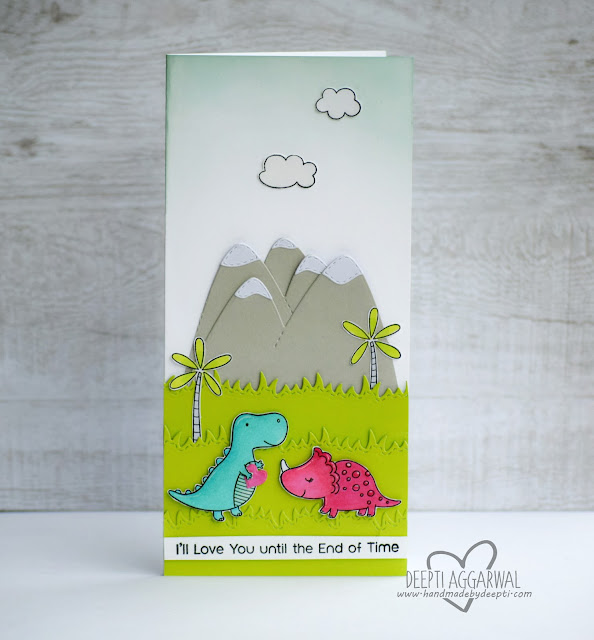
MFT Stamps - Cute Dinosaurs Love Card 2

Hello Everyone,

I'm stopping by to share this quick post where I've made another love card using MFT Cutieasaurus stamp set. You can find my first one here.

Over to my card..


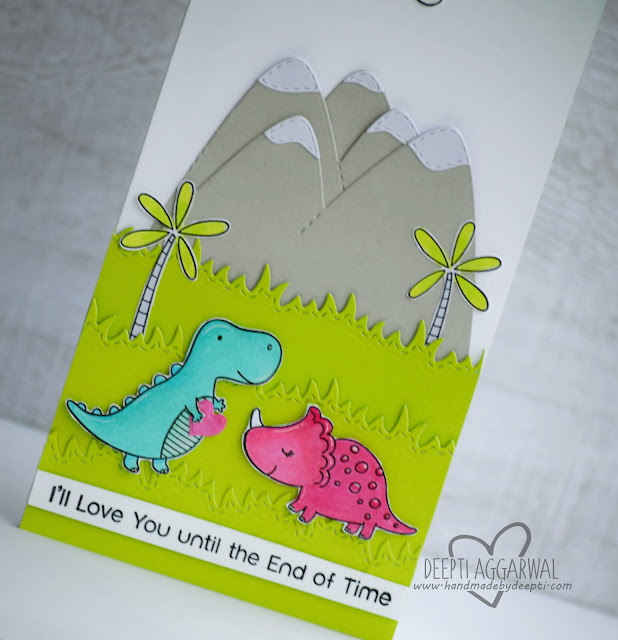
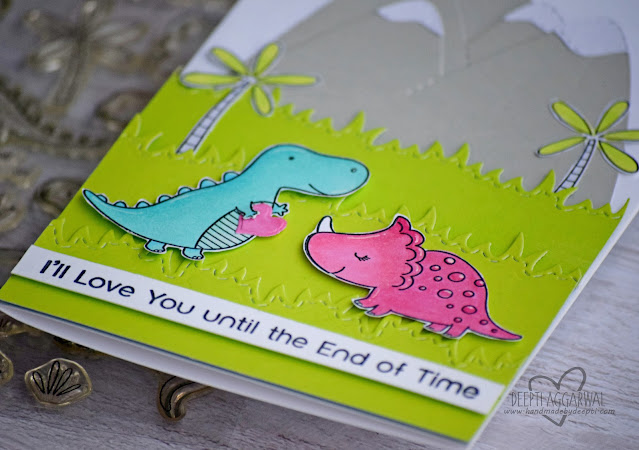
To make this card, I took slimline white card base and added die cut grass and mountains using foam tape.


Meanwhile, I stamped these cute images from MFT Cutieasaurus stamp set which I colored using Alcohol Markers and fussy cut it. I adhered these images to the card panel using foam tape.


Then, I stamped the clouds from same stamp set and fussy cut it. I adhered these to the panel  using glue.

Finally I stamped the sentiment to complete this cute Love card. I really like how this card turned out. I hope you like it too. 

Thank you for stopping by!!

Hugsxx
Deepti Aggarwal

Playing along with:

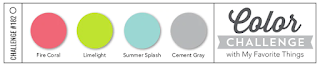
MFT Color Challenge 182
Cut it Challenge 244 - Hard to Say - Sometimes it is too hard to express your feelings to someone you love. 

Friday, 24 December 2021

Crealies - Stenciled Flower Card

Hello There,

I'm stopping by to share this Flower Birthday card using Crealies latest released Rosette Flower stencil.        


To make this card, I first took a white card stock and die cut it out using small stripes Mini Slimline dies.


I stenciled this die cut out panel with small flowers in the Rosette Flower stencil using Distress Ink & Oxides. For darker shade of flower I've used 'Festive Berries' Distress Ink and for lighter shade I've used 'Kitsch Flamingo' Distress Oxide.

Once done stenciling, I adhered this panel to the die cut out Mini Slimline Base.


Then I die cut the the sentiment using Alfies dies and adhered it the card panel using glue. And finally I added some clear sequins to complete this card.

I hope you get inspired. 

Thank you so much for stopping by!! 

Hugsxx
Deepti Aggarwal

I have used following Crealies products:

Crealies Dies / Stansen:

Crealies Mixed Media:


Friday, 10 December 2021

Crealies - Stenciled Birthday Card

Hello Everyone,

I'm stopping by to share this colorful Birthday card using Crealies Hexagon stencil. To make this card, I first took a White card stock which was a bit bigger than the Mini Slimline card and stenciled it with Hexagon stencil using Distress Inks. 


For creating this Hexagon chain pattern, I first stenciled the panel as it is using the stencil. Then I moved the stencil to the right and made sure that hexagon is falling between to already stenciled hexagon. After that I moved the stencil below between the two chains of hexagon and then again right to complete the chain.


Once done with the background, I die cut it out using scalloped Mini slimline dies where I adhered the scalloped part on the card base using glue and then rectangle one using foam tape to give it some dimension.


Then I die cut the the sentiment using Alfies dies and adhered it the card panel using foam tape. I replace the 'O' with the balloon die cut out to add some interest. And finally added some clear sequins to complete these cards.

I hope you get inspired. Thank you so much for stopping by!! 

Friday, 24 September 2021

Crealies - Poinsettia Christmas Card

Hello Everyone,

I'm stopping by to share this mini slimline Poinsettia Christmas card using latest released Poinsettia dies along with Mix & match zig zag stripe dies.


To make this card, I first die cut out the White cardstock using Outermost & Innermost Mini Slimline dies. Then, I dry embossed the innermost layer using Zig Zag Stripes dies to add some texture to the cardstock. I adhered this embossed cardstock to outermost layer and mounted the same on white card base.


After that, I die cut out the Flowers layers & leaves using Poinsettia dies and Holy Leaves dies respectively. I  I ink blended these die cut out using Distress Oxides. Then, I arranged the flower & leaves on card panel and adhere it using glue.


Then I die cut the Christmas sentiment on Gold glitter cardstock and glued it to the panel.


Finally, I added Gold Nuvo drops at the center of the flower along with some gold sequins to complete this beautiful Christmas Card. 

I really enjoyed making this Christmas Card. I hope you get inspired.

Thank you so much for stopping by!! 

Hugsxx
Deepti Aggarwal

I have used following Crealies products:

Crealies Dies / Stansen:

Wednesday, 4 August 2021

Crealies - Slimline Christmas Tree Card

Hello Everyone,

I'm stopping by to share this Slimline Christmas Card using Geometric Christmas Tree Bits & Pieces Element stamp set. I really love how this card turned out with gold embossing & pigment colors. 

Over to my card..


To make this card, I die cut out the slimline panel using double stitched slimline dies and stamped the trees randomly using Versamark ink and then heat embossed it using Gold Embossing Powder.


After that, I added Pigment powder in shades of Green and sprayed lots of water using spray pen and moved the colors around the panel. I kept adding pigment colors till I was satisfied. Once this panel dried, I splattered it with green and Gold pigment colors to add interest.


Then, I adhered this panel to the Green colored card stock. I die cut out sentiment on Gold Glitter paper using Wordzz and Alfies dies and adhered to the card panel. 


For the final touch up, I added some gold sequins to complete this card.

I hope you get inspired.

Thank you so much for stopping by!! 

Hugsxx
Deepti Aggarwal

I have used following Crealies products:

Crealies Dies / Stansen: