Saturday 31 October 2020

Christmas card using Kaleidoscope Powder- Hedgehog Hollow October Subscription Box

Hello Everyone, 

I’m at the Hedgehog Hollow blog  with my final card using October month Subscription box . For today’s post, I played with this new to me Kaleidoscope Powder from Maker forte which came in October box and made this non -traditional Christmas card. 


I have step by step video tutorial too for this card, head over to my YouTube channel.


To start with I took A2 size water colored card stock and ink smooshed it using Kaleidoscope powder which I sprayed with water. But the result was not as I expected ;). So I changed my mind and instead of ink smooshing I created striped background by mixing small quantity of nebula powder with water.


Once satisfied, I adhered this striped background on white card base. For the Bauble, I die cut out two circles and stamped the small gift wreath from ‘Around Winter’ Stamp set using Color Hive – Clear – Hexagonal Embossing Glue Ink Pad and applied Nebula Kaleidoscope powder using Powder Brush .


After that, I adhered these die cut out circles on the front panel of the card using foam tape. I glued matching twine with Ranger Glossy Accent and converted this die cut out circle in to a Christmas Bauble :).


Finally, I stamped the sentiment using Ranger Black Archival Ink and added some Silver Star Confetti’s to complete this card. I really like how it turned out and the shimmer it gives. I hope you like it too.


Don’t forget that you can share your projects on The Hedgehog Hollow Box Facebook group as well as Stamping at the Hedgehog Hollow Facebook group. We would love to see what you are creating with this wonderful box. If not then you can shop your Hedgehog Hollow box now.

Thank you so much for joining me today . I’ll be back here soon.

Hugsxx

Deepti Aggarwal ( Blog | Facebook | Instagram | YouTube )

Friday 30 October 2020

Kinda Cute by Patricia - Happy Winter!!!

Hello Everyone,

Here I'm stopping by to share my DT Post for Kinda Cute by Patricia. For my card I have used this cute digi set called Snowman and sled and made this Christmas card for my stash.  Isn't is guy cute???... 

You can find so many kinda cute digis on her shop :)... not only this ... all the digi's are at 50% discount and you can choose from more than 500 digis.. so hurry up before its too late ;)

Over to my card..


I can't even express, how much I enjoyed making this backdrop for this cutest Snowman using alcohol markers...I am enjoying experimenting with my markers and making one layered cards.


I really loved how it turned out. Once I was satisfied with coloring, I added the snow using white gel pen.


Adhered this colored panel on blue colored card stock. Finally stamped the sentiment from Winnie and Walter stamp set to complete this one layered card.


I hope you like it.

Thank you so much for stopping by!!

Hugsxx

Deepti Aggarwal

Wednesday 28 October 2020

InkyStamper - Fry box party favor

Hello Everyone, 

I'm stopping by to share this cute Party favor Fry box using InkyStamper small fry box dies. Isn't this box cute??? I made this for my younger daughter's friends. I'm so happy that my girl loved these cute treat boxes for her friends. Here is the pic of one of the box...


I've used double sided pattern paper which I die cut out using InkyStamper Fry box dies  to make the box. Then I die cut out the flowers and tag which is also part of this fry box dies. I inked these flowers & tag with orange distress oxide to make it more bright..


Then I layered the flowers and adhered it to the box using foam tape along with hand cut out leaves. Added the treats in cellophane and tied it along with thread and tag... Ta da.... this cute box is ready for this fall season..


I hope you like it..I really enjoyed making so many of these for my little girl.

Thank you so much for stopping by!!

Hugsxx
Deepti Aggarwal

Sunday 25 October 2020

Mandala Birthday Card - Hedgehog Hollow October Subscription Box

Hello Everyone, I’m excited to be back at Hedgehog Hollow blog with another post using October month Subscription box . I thought of trying something different and made this colorful birthday card using Mandala stencil from the kit. So, you can use this month’s subscription box to make some non- Christmas cards too ;). Over to my card..

Mandala birthday card

To start with, I took perfect blend card stock and secured this mandala stencil over the card stock with washi tape and inked it using Distress Oxides. For that I’ve used Squeezed Lemonade, Carved Pumpkin and Candid apple Distress Oxides colors.


After that, I rotated the stencil and secured it at a place where white part was visible and again inked it using Distress Inks. I have used Crushed Olive and Salty ocean colors for that . Then, I rotated it one more time and inked it again using Picked raspberry Distress Ink.


I really like how the color blends in this perfect blend card stock so effortlessly and it gives a finish of a photo print.


Once satisfied, I adhered this stenciled card panel on A2 size white card base. Then, from my stash , I stamped the big Happy sentiment and glued die cut out Birthday sentiment on top of the stamped sentiment to complete this card.


I really enjoyed making this Mandala Birthday card. I hope you like it too. Don’t forget that you can share your projects on The Hedgehog Hollow Box Facebook group as well as Stamping at the Hedgehog Hollow Facebook group. We would love to see what you are creating with this wonderful box. If not then you can shop your Hedgehog Hollow box now.


Thank you so much for joining me today . I’ll be back here soon.

Hugsxx

Deepti Aggarwal ( Blog | Facebook | Instagram | YouTube )

Playing along with:

Crealies - Slimline Holiday Card..

Hello Everyone,

I'm at Crealies with this cute Penguin Holiday card using Crealies new slimline dies. It's so much fun to make slimline cards.. Isn't it??? I really enjoyed making this one using just the dies.. yes you heard it right.. Just dies....'No Stamping'  ;). 


To make this card, I first die cut out white card stock using innermost slimline die and distress inked it. Sprinkled it with water and also with white acrylic paint to give the effect of snow.


After that I die cut out 4 penguins using Partzz penguin builder dies on black and white card stock, colored the beak and feet with orange color and assemble it. Once satisfied, adhered the same on the inked background as shown in the pic using foam tape. I cut the extra part of the penguins which was coming out of the panel using scissors.


Then, I glued the die cut out sentiment to complete the front panel which I layered on another die cut out white panel using second layer of slimline dies. Finally I adhered it on white card base where I inked the edges using same color to match it with the front panel. Voila!!! our slimline holiday card is ready :).

I hope you get inspired.

Thank you so much for stopping by!!

Hugsxx
Deepti Aggarwal

I have used following Crealies products:

Crealies Dies / Stansen:
                 

Sunday 18 October 2020

Kinda Cute by Patricia - Bee Merry!!

Hello Everyone,

Here I'm stopping by to share my DT Post for Kinda Cute by Patricia. For my card I have used this cute digi set called Santa Bee and made this Christmas card for my stash.

Over to my card..


To make this card, I took A2 size white card stock and stenciled it using Honeycomb Delight - ARTplorations Stencil  with distress oxides and then ink smooshed it too to add some interest.


Meanwhile I colored this cute images with Gansai Tambi Watercolors,  fussy cut it and adhered these images on the card base using foam tape. Then, I added glossy accent on Bee's wings and cap to give some texture (though it's not visible in the pic). Did some doodling too.. :)


Added handwritten and stamped sentiment along with some gold sequins to complete this card.

I hope you like it.

Thank you so much for stopping by!!

Hugsxx

Deepti Aggarwal

Saturday 17 October 2020

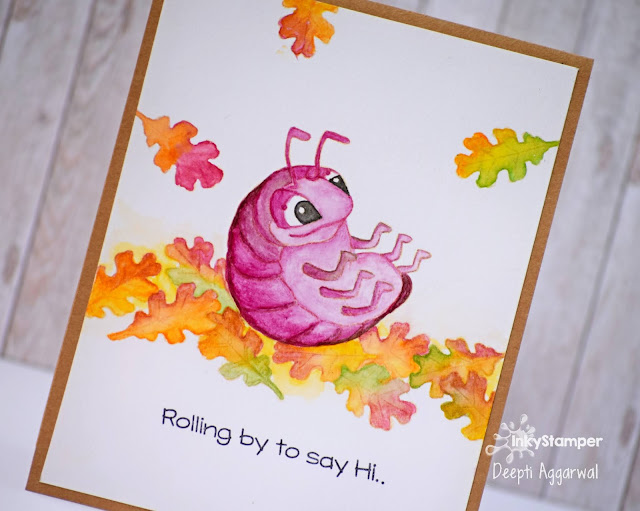
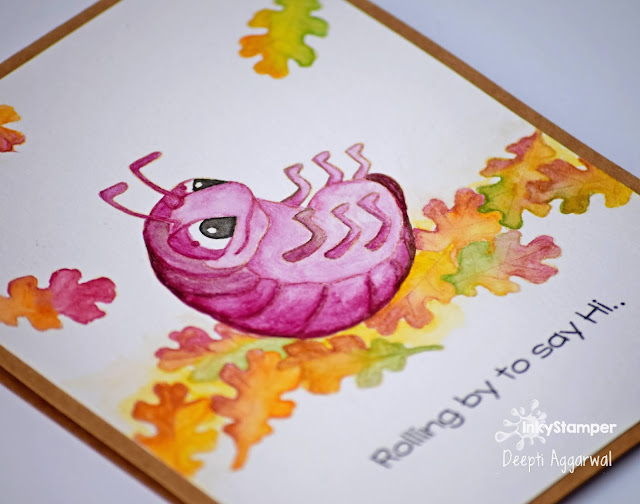
Rolling by to say Hii....InkyStamper Stamps

Hello Everyone,

I'm rolling by to say a big  Hiiiiii..... 

Have you ever heard about "Pill Bugs"???  Yes??? No..??? I'm asking because in today's card, I am featuring  one of these bugs from InkyStamper  And for Me... this was the first time I heard about them and I really need to google to know more about these cutie bugs :) .. If you want to know more about them then check this Wikipedia link .

Over to my card...I made this one layer Fall card using  InkyStamper stamp set called "Roly Poly"  and did no-line coloring. I really like this cutie Roly Poly bug. Isn't he cute??

Roly Poly hello card

To make this card, I took A2 size water color card stock and stamped this Roly Poly bug using "Antique Linen" distress ink as I was planning to do no- line coloring. After that I stamps these leaves from InkyStamper "Owl" stamp set by masking them.

Pill bug water colored fall card

I colored stamped images using Gansai Tambi water colors. Once done, I stamped the sentiment using  Nuvo Ink - Black Shadow . Then I mounted this on Kraft card base.

No - line coloring on pill bug card

I hope you like it. Thank you so much for stopping by!

Hugsxx
Deepti Aggarwal

Playing along with:

Shimmery Christmas Card - Hedgehog Hollow October Subscription Box

Hello Everyone, I’m so excited to be back at The Hedgehollow blog with my second post using October month Subscription box . Have you ever tried Glitter Paste on your cards? It's so much fun and the results are just awesome. Today I'm sharing super shimmery Christmas card using SILVER Glitter Paste. 

Christmas Card  with Glitter paste

You can try this fun technique using any Glitter Paste you have in your stash. I have step by step video tutorial too for this card, head over to my YouTube channel  to watch it..


To start with I took perfect blend White card stock which came in to the box and Distress inked the background using Pine Needles Distress Ink and Mowed Lawn Distress Oxide. Once I was done with blending, I splattered it with water to add interest.


After that I took the Mandala stencil and secured it on the inked card panel using tape. I applied Silver Glitter Paste generously over the stencil till I was satisfied , removed the stencil and let it air dry.


Once it dried completely, I adhered it on white card base. For the sentiment, I die cut out a circle on vellum and stamped the sentiment from "Around Winter" Stamp set using Color Hive – Clear – Hexagonal Embossing Glue Ink Pad and then heat embossed it using Papermania Silver Embossing powder. I glued this vellum at the center of the card panel using Ranger's Glossy Accent.


Then, I glued Silver thread along with a small bow and converted this die cut out stamped vellum in to a Christmas Bauble :). 
Finally, I added some Silver Star Confetti's to complete this card. I really like how it turned out. I hope you like it too.


Don’t forget that you can share your projects on The Hedgehog Hollow Box Facebook group as well as Stamping at the Hedgehog Hollow Facebook group. We would love to see what you are creating with this wonderful box. If not then you can shop your Hedgehog Hollow box now.

Thank you so much for joining me today . I’ll be back here soon.

Hugsxx
Deepti Aggarwal

Playing along with:

Friday 16 October 2020

Crealies - Spinner wheel interactive card

Hello Everyone,

I'm stopping by to share this "Spinner Wheel" winter card using Crealies newly launched dies. I really enjoyed playing with this fun interactive dies. With single dies either you can make it reveal wheel or spinner wheel card. I've already made reveal wheel card  which you can find here. In this post I am sharing spinner wheel card.


To make this card, I first made the spinner mechanism where I stamped the top panel with snowflakes stamp set. . Please follow Mandy's YouTube video to make the spinner mechanism. She has explained it so beautifully.


The only difference which I made is that instead of putting transparent sheet , I added die cut out circle where I adhered all the snowmen which I stamped, colored with alcohol marker and fussy cut.


Finally, I added stamped sentiment on die cut out circle  and adhered it at the center using foam tape along with some silver sequins to complete this card.

Here is small video to show the mechanism..:)


I hope you get inspired.
 
Thank you so much for stopping by!!

Hugsxx
Deepti Aggarwal

I have used following Crealies products:

Crealies Dies / Stansen:

Crealies Stamps / Stamps:
                 
       Stamping cardstock, white 240 grams (20x A4)