Sunday, 31 October 2021

Maker Forte - Fun with Watercolor Brush Markers (Video Tutorial)

Hello Everyone, I hope you are enjoying wonderful Halloween weekend. 

I'm at Maker Forte Blog sharing these fun Birthday cards using Maker Forte Cheers Stamp set. I really love this stamp set to create some quick Birthday cards for my friends.


If you feel lazy coloring your images but love the artistic effect of water coloring. Then, I'm sure, you will enjoy this fun video where I'm showing how you can use your Watercolor Brush Markers to create this artistic effect for your handmade cards. Hop over to my YouTube channel to see the step by step process or click the below link..


Card 1

To make this card, I took Canson Water color paper which I cut it out approx. 1 c.m less than A2 size. I stamped the focal image from Maker Forte Cheers Stamp set using Ranger's Waterproof Archival ink. Then, I colored the image using Watercolor Brush Markers and sprayed it with Make Forte - Mister Perfect Spray Bottle to activate the Ink. Check my video to see the step by step process.


Once satisfied, I splattered the water colored panel with same colors to further add interest. I mounted this panel over the Maker Forte - Hyde Park colored card stock. I stamped the sentiment from Maker Forte Soda-lightful stamp set to complete this fun Birthday Card.


Card 2

I have used the same technique as above to make this Monochromatic Birthday card. Here, I stamped the image using Maker Forte Color Hive Clear Ink and Heat embossed it using White Embossing Powder.


I colored this focal image using shades of blues Watercolor Brush Markers and splattered it with same colors. Adhered this panel to the Maker Forte Windsor Blue colored Card stock and added the sentiment from same Maker Forte Soda-lightful stamp set to complete this Masculine Birthday Card.


It was really fun playing with my Aqua Markers and putting this video together. I love the artistic effect on these Birthday Cards. I hope you get inspired.


Thank you so much for stopping by!!! I hope you will check my video tutorial and support me by subscribing to my YouTube channel.

Hugsxx 
Deepti Aggarwal 

Disclaimer - Links used in this post are affiliate links, meaning, at no additional cost to you, I will earn a small commission if you click through and make a purchase. Thank you for your support.

Monday, 25 October 2021

Crealies - Rainbow Cards using Pattern Mix dies

Hello Everyone,

I'm stopping by to share these two Colorful Cards using Crealies Amber Pattern Mix dies.


For my first card, I have die cut out this lace pattern from Amber Pattern Mix dies in colorful cardstocks and adhered these to the White card base using glue. 


For the sentiment, I die cut the Circle on Black Cardstock and then die cut out the 'HI' sentiment from it using Alfies dies. Then, I  die cut the HI sentiment on white card stock and inlaid it to the Black Circle die cut out to add interest.


I adhered this circle on card panel using foam tape to give some dimension. I went overboard with my rainbow sequins and added so many in a row over the die cut out to complete this rainbow card.


For my second card, I took white Card strip and die cut out the HUGS sentiment using Alfies dies and adhered it to the black card stock to highlight the sentiment. Then I added this white Strip to card panel along with golden colored Washi Tape.


Meanwhile, I die cut this beautiful Pattern on colored card stock and adhered it the the card front as shown. 


I added some gold sequins to complete this card. I really like how these two cards turned out. 


I hope you get inspired. Thank you so much for stopping by!! 


Hugsxx
Deepti Aggarwal

I have used following Crealies products:

Crealies Dies / Stansen:

Sunday, 24 October 2021

Kinda Cute by Patricia - Thanks for OWL you do!!!

Hello Everyone,

I'm stopping by to share my DT Post for Kinda Cute by Patricia. For this card,  I have used this cute Digi set called 'Owl'  which includes three cute Owls in different poses :)

Over to my card..


To make this card, I took Slimline White card base and adhered die cut out wooden pattern paper on it.


Then, I die cut out these Circle and leaves using Aveccreative Love2craft layered dies and ink blended it. I adhered these circle dies on card front panel.


Meanwhile, I printed these cute digi, colored it with Alcohol markers and fussy cut it. I adhered these to the card panel using foam tape.


I heat embossed the sentiment from InkyStamper Owl Stamp set using White embossing Powder. Finally I added some clear sequins from Picket Fence to complete this card.


I really like how this card turned out. I hope you like it too.

Thank you so much for stopping by!!


Hugsxx

Deepti Aggarwal

Friday, 22 October 2021

Maker Forte - Pop Art inspired quick Birthday Cards

Hello There,

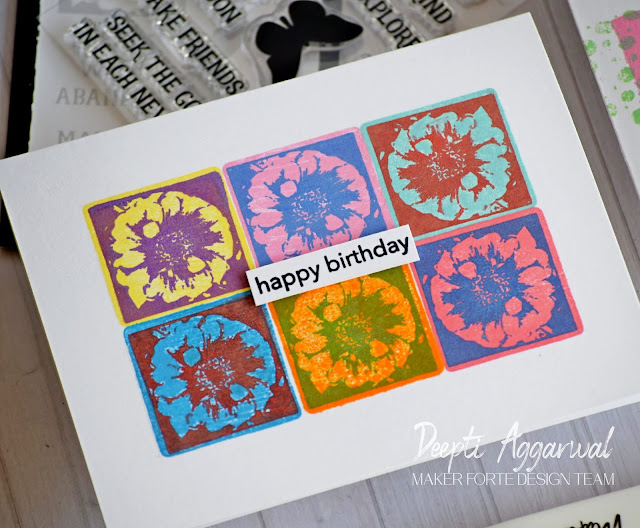
Who loves Pop Art and the bright colors in this Art??? I'm at Maker Forte Blog with two Bright & colorful Birthday cards inspired by the same Art. I am a big fan of all the bright & rainbow colors. For today's post I've focused on latest released Snail Mail Inspiration Stamp designed by Eileen Hull

Over to my cards...


Card 1

This card is completely inspired by Pop Art. To make it, I took Maker Forte A2 size Ultra White - Heavy Weight card stock. Then I stamped the squares using back side of flower block stamp from Snail Mail Inspiration Stamp with different Distress Oxides colors. For that I've used following 6 Distress Oxide Colors. Starting from top left to right Squeezed Lemonade, Kitsch Flamingo, Salvaged Patina, Salty Ocean, Carved Pumpkin and Worn Lipstick respectively.


After that, I stamped the flower block from same stamp set over the stamped squares using following Distress oxide colors from top left to right Wilted Violet, Blueprint Sketch , Candid Apple, again Candid Apple and Blueprint Sketch.
 

I stamped the sentiment on white strip from Snail Mail Everyday Sentiments Stamp set by Eileen Hull . And adhered it to the card panel using foam tape to complete this Birthday card.

Card 2


For this card, I let my mind wander around and randomly stamped the Circular & Rectangular Brush Strokes from Easy Watercolors Stamp set . I've used same Distress Oxide Colors which I've used in above card. Then I stamped the silhouette Butterfly from Snail Mail Inspiration Stamp .


To add some interest, I randomly stamped some patterns from Art Marks Stamp set designed by Mansi Makes using same Distress Oxide colors. Finally added the Birthday sentiment from Easy Watercolors Stamp set to complete this bright & colorful Birthday Card.


I hope you get inspired. Thank you so much for stopping by.


Hugsxx 
Deepti Aggarwal ( Blog | Facebook | Instagram | YouTube )

Disclaimer - Links used in this post are affiliate links, meaning, at no additional cost to you, I will earn a small commission if you click through and make a purchase. Thank you for your support.

Crealies - 5 Ways with one Background/Cover Plate Dies - Video Tutorial

Hello Everyone,

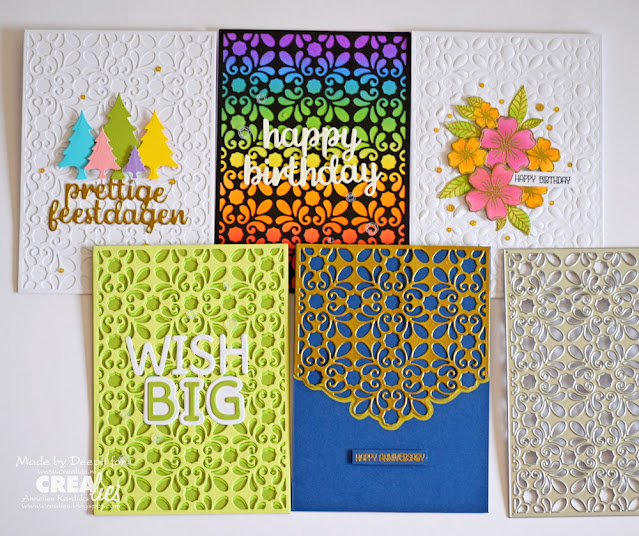
I'm stopping by to share this fun video where I have created 5 Cards using one Background/Cover plate Dies all with altogether different look.. Here I've used Crealies Patternzz XL Background Dies from their Amber Series.


Hop over to my YouTube channel "Handmade by Deepti" to see how I made these cards using one Background/Cover plate dies. If you like what I create then please support me by subscribing to my channel :). Over to the my video..


Following are the techniques I've used to create 5 different Cards using Single Background Plate dies.. This is going to be a Picture heavy Post ;)

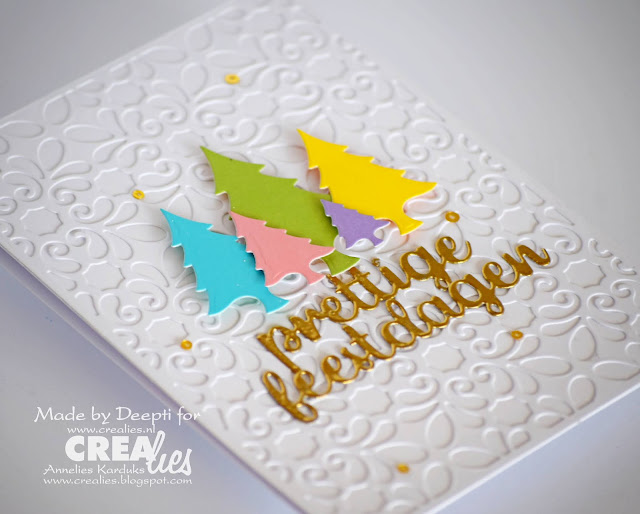
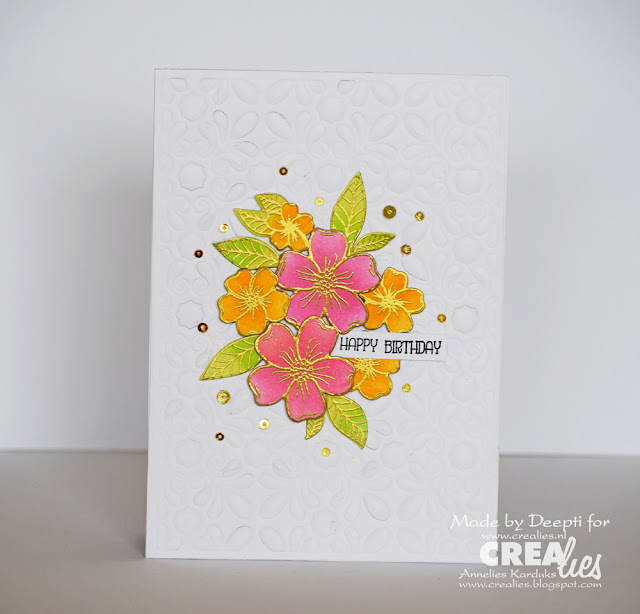
Tone on Tone 

This technique is so fun to create a subtle background for your focal images. You can use colored cardstock also instead of white on white.


Ink Blending 

Don't want to add focal images then this is just perfect to create your beautiful background and add sentiment. I've ink blend the background here but you can ink blend the die cut out itself. There are so many ways or you can use it as a STENCIL.


Trim it

Here I simply trimmed it and heat embossed it using Gold embossing powder. Perfect for making Wedding or Anniversary cards.


Dry Embossing

Here I Dry embossed it, Check my video to see how I did it..


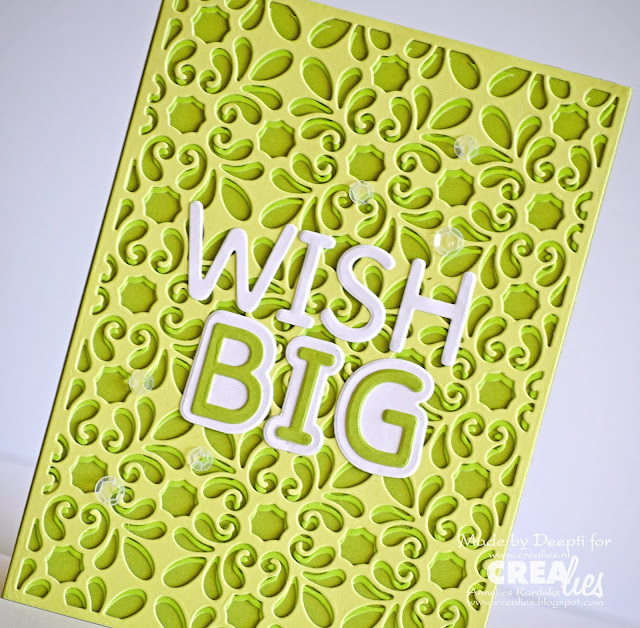
Layer it

Here I  Layered it using Colored Cardstock... It was so much fun creating these cards using single Background dies. 


I hope you get inspired.

Thank you so much for stopping by!! 

Hugsxx
Deepti Aggarwal

I have used following Crealies products:

Crealies Dies / Stansen:


    Stamping cardstock, white 240 grams (20x A4)