Tuesday, 29 June 2021

Maker Forte - Surf Up with Rainbow Colored Surfboards - Video Tutorial

Hello Everyone, 

I'm at Maker Forte blog with this fun Rainbow Colored Surfboard Slimline Card using Maker Forte latest release stamp called "Surf's Up". This 6x8" stamp set included beautiful images to create designer surfboards ;). In addition, I've used Maker Forte - Seaside Sentiments stamp and Spotlight Stencil - Surfboards.


I started with Ultra White - Heavy Weight 110lb Cover - Slimline Card Front from Maker Forte and stenciled the background using spotlight surfboard stencil and Distress Oxide Rainbow colors. For that, I've used Wilted Violet, Blueprint Sketch, Salty Ocean, Mowed Lawn, Squeezed Lemonade, Carved Pumpkin and Candid Apple Distress Oxides respectively. I've a step by step video tutorial here at my channel to show you how I made this rainbow colored Surfboard card..


Once done with stenciling , I stamped the Surfboard designs using the same Distress Oxide colors and heat embossed it using Ranger's Clear Embossing Powder.


Then, I mounted this panel on Eclipse Black Cardstock. After that, I heat embossed the sentiment from Seaside Sentiments Stamp on Black strip using Ranger's White Embossing Powder. I adhered it to the card base using foam tape.


For the final touch up, I added some matching Neon Crown Jewel Gems to complete this card.


I hope you get inspired. Thank you so much for stopping by.

Hugsxx 
Deepti Aggarwal

Monday, 28 June 2021

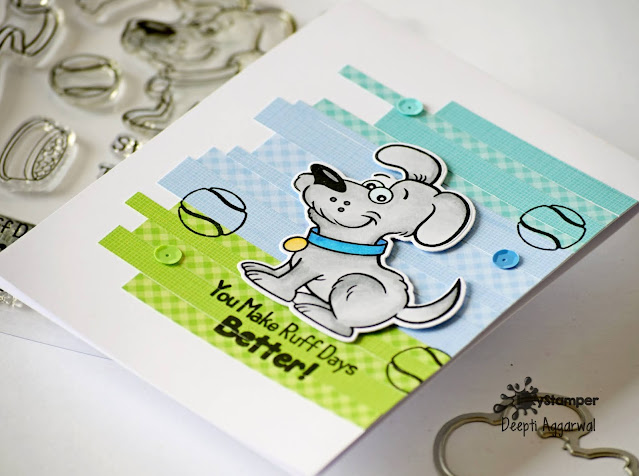
InkyStamper Stamps - You Make Ruff Days Better!!

Hello Everyone,

I'm stopping by to share this cute Friendship card using InkyStamper's latest release Dog stamp set. Isn't he cute??? I'm happy that I was able to use these left over strips of Gingham pattern paper from my previous projects.

Over to my card..


To make this card, I took A2 size White Card base. Then, I glued these pattern paper left over strips for the background.


Meanwhile, I stamped this image on white cardstock , colored it with Alcohol Markers and die cut it using coordinating dies. I adhered this image on the panel.


After that, I stamped the balls along with the sentiment from same stamp set. Finally I added some matching sequins to complete this card.

I hope you like it. Thank you so much for stopping by!

Hugsxx
Deepti Aggarwal

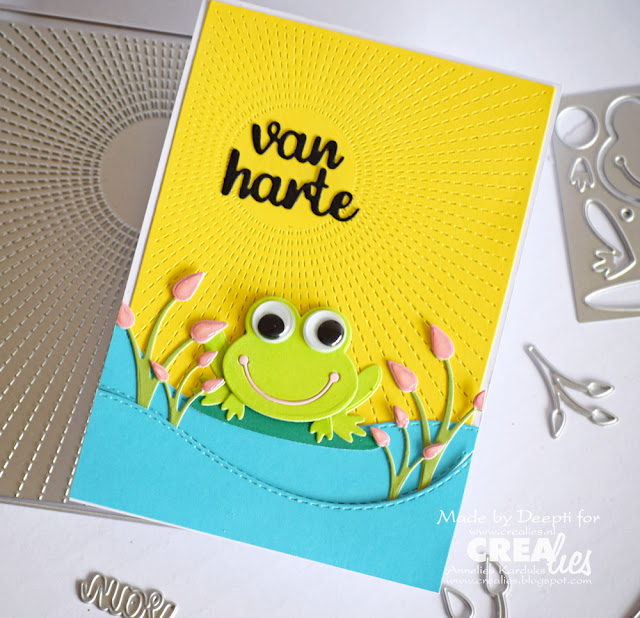
Crealies - Create a Scene with dies only - Video Tutorial

Hello Everyone,

I'm stopping by to share this cute little scene which I've created  using Crealies dies only. Yes... you heard it right, no stamping, no coloring just die cutting on some colored cardstocks. 

Over to my card..


I have a step by step video tutorial to show you how I made this card. Hop over to my YouTube channel or click the video below to see it..


Here is the close up...


I really love this sun rays dies from the latest release. It's just perfect to create some beautiful summer scenes along with some cute critters. 


I really enjoyed making this cute summer card. I hope you get inspired.


Thank you so much for stopping by!! 

Hugsxx
Deepti Aggarwal

I have used following Crealies products:

Crealies Dies / Stansen:


Saturday, 26 June 2021

InkyStamper Stamps - Rx XOXO (Hugs & Kisses)

Hello Everyone,

I'm stopping by to share this Clean & Simple XOXO (Hugs & Kisses) Pun card which I made for a friend to make her feel better using InkyStamper's Roly Poly stamp set. I hope this card will put a smile on her face :)..

Over to my card..


To make this card, I took A2 size White Card base. Then, I stamped these Rx bottle from Roly Poly stamp set using rainbow colored Distress Oxides where I masked it every time I stamped the next bottle. 
 

To add interest, I  stamped these bottles with 'Rx' sentiment and colored it using the same Distress Oxide colors. 


Once satisfied, I die cut out this XOXO sentiment from my stash on black cardstock and glued it on the card panel to add some Pun to this card.

I hope you like it. Thank you so much for stopping by!

Hugsxx
Deepti Aggarwal

Playing along with:
STAMPlorations June CAS Challenge - playing without twist
Time Out Challenge #190 - inspired by rainbow colors

Friday, 25 June 2021

Kinda Cute by Patricia - Happy Beeday!

Hello Everyone,

I'm stopping by to share my DT Post for Kinda Cute by Patricia. For this card,  I have used this cute Digi set called 'Bumble Bee'  which has included 3 cute Bee digital images in different poses. And for the birthday elements, I've used 'Birthday Party Digi set'.

Over to my card..


To make this card, I took white card stock and die cut it using  Honeycomb dies from Sizzix Thinlits Die Set 4PK - Mixed Media #1 by Tim Holtz  and cut it twice from the center of the card stock. Then, I adhered this die cut out panel to the Yellow colored card base.


Meanwhile, I printed this cute digis, colored these with Alcohol markers and fussy cut it. I adhered it to the  card panel using foam tape.


I stamped the sentiment  and added some gold sequins to complete this card. I really like how this card turned out. I hope you like it too.

Thank you so much for stopping by!!

Hugsxx

Deepti Aggarwal

Playing along with:
Seize the Birthday #217 - playing without toppings
NBUS Challenge #27 - Honeycomb dies which I bought 5-6 years back and now finally used it. Yay!!! It's an achievement ;)

Tuesday, 22 June 2021

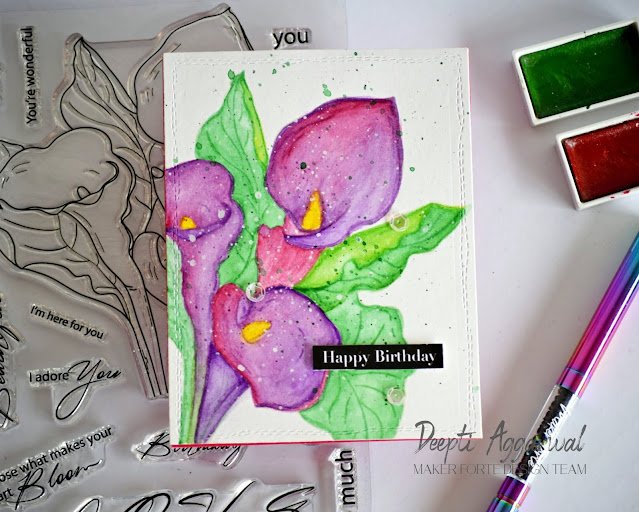
Maker Forte - No-line Water Coloring with Alex Syberia's ' I Adore You' Stamp

Hello Everyone, I'm at Maker Forte's Blog  with this is no-line water colored Birthday card using Alex Syberia's 'I Adore You' Stamp Set. Any flower lovers there??? Yes... then you will love this big flower illustration from Alex. I really enjoyed coloring it.


To make this card, I took Canson's Water colored paper and die cut it out using STAMPlorations Crazy double stitched A2 size rectangular dies. Then I stamped the flowers using Ink on - 3 Fade out Ink for no-line coloring.


Then, I colored it using Gansai Tambi Water Colors using shades of Pink, Purple & Green. Once satisfied with coloring, I splattered this card using same colors in addition with white acrylic paint to add interest.


Then, I adhered this Water Colored panel to the Colored Cardstock from Maker Forte. For the sentiment, I've just cut out the pre-printed sentiment sheet from Maker Forte with multiple sentiments in white and Black. I really find it handy for my cards. I adhered it to the card panel using foam tape to give some dimension.


Finally, I added some clear sequins to complete this no-line Water colored Birthday card. After a long time, I did some Water Coloring and really enjoyed it.

I hope you get inspired. Thank you so much for stopping by.

Hugsxx 
Deepti Aggarwal ( Blog | Facebook | Instagram | YouTube )

Playing along with:

Wednesday, 16 June 2021

Kinda Cute by Patricia - Lemur Birthday Card

Hello Everyone,

I'm stopping by to share my DT Post for Kinda Cute by Patricia. For this card,  I have used this cute Digi set called 'Lemur'  which has included 3 cute Lemur digital images in different poses. And for the birthday elements, I've used 'Birthday Party Digi set'.

Over to my card..


To make this card, I took white card stock, masked half of the card using masking paper and ink blended it using 'Peeled Paint', 'Mowed Lawn' & 'Crushed Olive' Distress Inks. Once satisfied, I sprinkled some water to add interest. Then I stenciled it using Tubby Craft - Circle Spread Stencil.


After that, I stamped the sentiment from one of my MFT  stamp set. Meanwhile, I printed this cute digis, colored these with Alcohol markers and fussy cut it. I adhered it to the stenciled card base using foam tape to complete this card. 


I really enjoyed making this fun Birthday card using this cute Lemur. I hope you like it.

Thank you so much for stopping by!!

Hugsxx

Deepti Aggarwal

Playing along with:
STAMPlorations June CAS Challenge - playing without twist

InkyStamper Stamps - It's a Cupcake kind of Day!

Hello Everyone,

I'm stopping by to share this cute Birthday card using InkyStamper's Cupcake & Cookies stamp set for their Facebook Group challenge where the theme is "Stamped Background".
 

To make this card, I took A2 size White Card base. Then, I masked the edges of the panel using washi tape and stamped the sprinkles from Cookies stamp set using Rainbow colored Distress Oxide.


Meanwhile, I stamped this Cute Ralph from Cupcake Stamp Set, colored it with alcohol markers and die cut it out using coordinating dies. I removed the Washi tape and adhered the colored image using foam tape. I added some glossy accent on the cupcake sprinkles to add some texture.


After that, I heat embossed the sentiment on Black strip using white embossing powder and adhered to the card panel. Finally I added some heart confetti's to complete this card. 

I hope you like it. Thank you so much for stopping by!

Hugsxx
Deepti Aggarwal

Tuesday, 15 June 2021

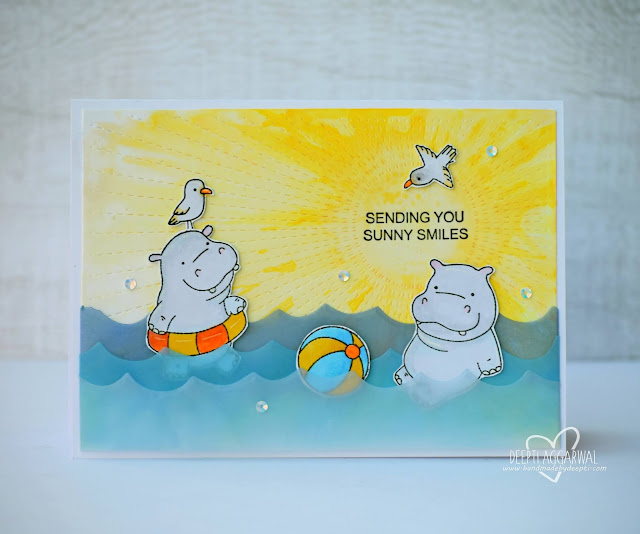
Sending Sunny Smiles

Hello Everyone,

Here is my quick post, I'm stopping by to share this Summer card...


To make this card, I took photo paper and embossed this sun rays background using Crealies stitched sun rays dies. Then I created this yellow background using Yellow Alcohol inks. 


Once satisfied with the background, I die cut out the waves on vellum and ink blended it using Blue shades of Distress Inks and Oxides. I adhered these waves on the back of the card front panel which I mounted on White Card base.


Meanwhile, I stamped these cute images, fussy cut these and colored it using Alcohol markers. I adhered these image on the card panel using foam tape.

Finally I stamped the sentiment from same stamp set and added some sequins to complete this card. I really enjoyed creating this fun Summer scene. I hope you like it too.

Thank you so much for stopping by!!

Hugsxx
Deepti Aggarwal

Playing along with:


Monday, 14 June 2021

Crealies - Birthday Card with Dry Embossing Technique

Hello Everyone,

I'm stopping by to share this cute Birthday card using Dry Embossing Technique where I created this embossed background with Crealies XXL square nesting dies. 


To make this card, I took white card stock and dry embossed it. Then I die cut the square using the same dies. I adhered this embossed panel on White card base.


I ink blended the die cut out square and adhered it to card base using glue. Then, I die cut out this cute dog, Balloon and the swirl which I ink blended and adhered to the card base using foam tape to give some dimension.


After that, I die cut out Birthday sentiment, ink blended it and adhered to the card base along with stamped Happy sentiment.


Finally, I added some heart embellishment to complete this card. I hope you get inspired.

Thank you so much for stopping by!! 

Hugsxx
Deepti Aggarwal

I have used following Crealies products:

Crealies Dies / Stansen: